How to Install Virtualmin on Ubuntu 22.04
-
- 91
Prerequisites
- Have an Ubuntu 22.04 server.
- Create a domain name A record pointing to the server IP address. For example,
virtualmin.example.com. - Access the server using SSH as a non-root user with sudo privileges.
- Update the server.
- Install a 2FA application such as Google Authenticator on your device.
Install Virtualmin
Virtualmin is not available in Ubuntu 22.04’s default repositories. Follow the steps below to download and install Virtualmin using the latest installation script.
- Set your domain as the new server hostname. For example,
virtualmin.example.com.CONSOLE$ sudo hostnamectl set-hostname virtualmin.example.com - Download and run the Virtualmin installation script. The command below installs the open source (GPL) edition of Virtualmin with the LAMP stack.
CONSOLE
$ sudo sh -c "$(curl -fsSL https://software.virtualmin.com/gpl/scripts/virtualmin-install.sh)" -- --bundle LAMP
Enter Y to proceed with the installation.
Wait for at least 5 to 10 minutes for the installation to complete.
[SUCCESS] Installation Complete!
[SUCCESS] If there were no errors above, Virtualmin should be ready
[SUCCESS] to configure at https://virtualmin.example.com:10000 (or https://192.0.2.1:10000).
Secure Virtualmin
Follow the steps below to generate trusted Let’s Encrypt SSL certificates and secure the Virtualmin web administration interface.
- Stop the Apache service to ensure Certbot can bind to port
80.CONSOLE$ sudo systemctl stop apache2 - Install the Certbot package Let’s Encrypt client to manage your SSL certificates.
CONSOLE
$ sudo apt install certbot - Request a new SSL certificate using your domain. Replace
virtualmin.example.comandvirtualmin@example.comwith your actual details.CONSOLE$ sudo certbot certonly --standalone -d virtualmin.example.com -m virtualmin@example.com --agree-tosIf a certificate already exists, Certbot displays a prompt:
You have an existing certificate that has exactly the same domains or certificate name...
1: Keep the existing certificate for now
2: Renew & replace the certificate
The above output means you have a valid SSL certificate. Select
1to keep the current certificate and exit.- If no prompt appears, Certbot will request a new certificate. Follow the instructions until you receive a success message confirming the certificate has been issued.
- After obtaining the certificate, create a bundle by concatenating the certificate and private key, then update the
keyfiledirective in the/etc/webmin/miniserv.conffile to point to the bundled file.CONSOLE$ sudo cat /etc/letsencrypt/live/virtualmin.example.com/fullchain.pem /etc/letsencrypt/live/virtualmin.example.com/privkey.pem | sudo tee /etc/webmin/ssl.pem
- Open the
miniserv.confconfiguration file.CONSOLEsudo nano /etc/webmin/miniserv.conf - Update the following line.
INI
...
keyfile=/etc/webmin/ssl.pem
...
- After obtaining the certificate, create a bundle by concatenating the certificate and private key, then update the
- If no prompt appears, Certbot will request a new certificate. Follow the instructions until you receive a success message confirming the certificate has been issued.
- Restart the Webmin service to apply your configuration changes.
CONSOLE
$ sudo systemctl restart webmin - View the status of Webmin service and verify that it is running.
CONSOLE
$ sudo systemctl status webminYour output should be similar to the one below:
● webmin.service - Webmin server daemon Loaded: loaded (/lib/systemd/system/webmin.service; enabled; vendor preset: enabled) Active: active (running) since Tue 2025-04-29 08:53:57 UTC; 5s ago Process: 58332 ExecStart=/usr/share/webmin/miniserv.pl /etc/webmin/miniserv.conf (code=exited, status=0/SUCCESS) Main PID: 58333 (miniserv.pl) Tasks: 1 (limit: 9385) Memory: 88.0M CPU: 953ms CGroup: /system.slice/webmin.service └─58333 /usr/bin/perl /usr/share/webmin/miniserv.pl /etc/webmin/miniserv.conf - Start the Apache service.
CONSOLE
$ sudo systemctl start apache2 - View the status of Apache service.
CONSOLE
$ sudo systemctl status apache2Your output should be similar to the one below:
● apache2.service - The Apache HTTP Server
     Loaded: loaded (/lib/systemd/system/apache2.service; enabled; vendor preset: enabled)
     Active: active (running) since Tue 2025-04-29 08:56:30 UTC; 4s ago
       Docs: https://httpd.apache.org/docs/2.4/
    Process: 58411 ExecStart=/usr/sbin/apachectl start (code=exited, status=0/SUCCESS)
   Main PID: 58415 (apache2)
      Tasks: 106 (limit: 9385)
     Memory: 11.2M
        CPU: 50ms
     CGroup: /system.slice/apache2.service
             ├─58415 /usr/sbin/apache2 -k start
             ├─58416 /usr/sbin/apache2 -k start
             ├─58417 /usr/sbin/apache2 -k start
             └─58418 /usr/sbin/apache2 -k start
Set Up Firewall Rules
Virtualmin uses the firewalld utility to manage firewall processes. Follow the steps below to allow necessary Virtualmin ports and services through the firewall.
- View the
firewalldservice status and verify that it’s running.CONSOLE$ sudo systemctl status firewalldOutput:
● firewalld.service - firewalld - dynamic firewall daemon Loaded: loaded (/lib/systemd/system/firewalld.service; enabled; vendor preset: enabled) Active: active (running) since Sun 2025-04-06 05:53:56 UTC; 1h 20min ago Docs: man:firewalld(1) Main PID: 46542 (firewalld) Tasks: 2 (limit: 9415) Memory: 25.8M CGroup: /system.slice/firewalld.service └─46542 /usr/bin/python3 /usr/sbin/firewalld --nofork --nopid - View all allowed ports in the firewall configuration.
CONSOLE
$ sudo firewall-cmd --zone=public --list-ports
Output:
20/tcp 2222/tcp 10000-10100/tcp 20000/tcp 49152-65535/tcp - View all allowed services.
CONSOLE
$ sudo firewall-cmd --zone=public --list-services
Output:
dhcpv6-client dns dns-over-tls ftp http https imap imaps mdns pop3 pop3s smtp smtp-submission smtps ssh
Access Virtualmin
Virtualmin runs on the default TCP port 10000 by default. Follow the steos below to access the Virtualmin web administration interface and create a new virtual server.
- Access your domain on port
10000to open the Virtualmin control panel interface.https://virtualmin.example.com:10000Enter your sudo user account details to log in to the Virtualmin interface.

- Click Next within the Post-Installation Wizard to set up any additional configurations on your server.

- Find and click Dashboard on the left navigation bar to access the system performance page.
Enable 2-Factor Authentication
2-factor authentication (2FA) enhances security by requiring a one-time code from your mobile device. Follow the steps below to enable 2FA for Virtualmin using Google Authenticator.
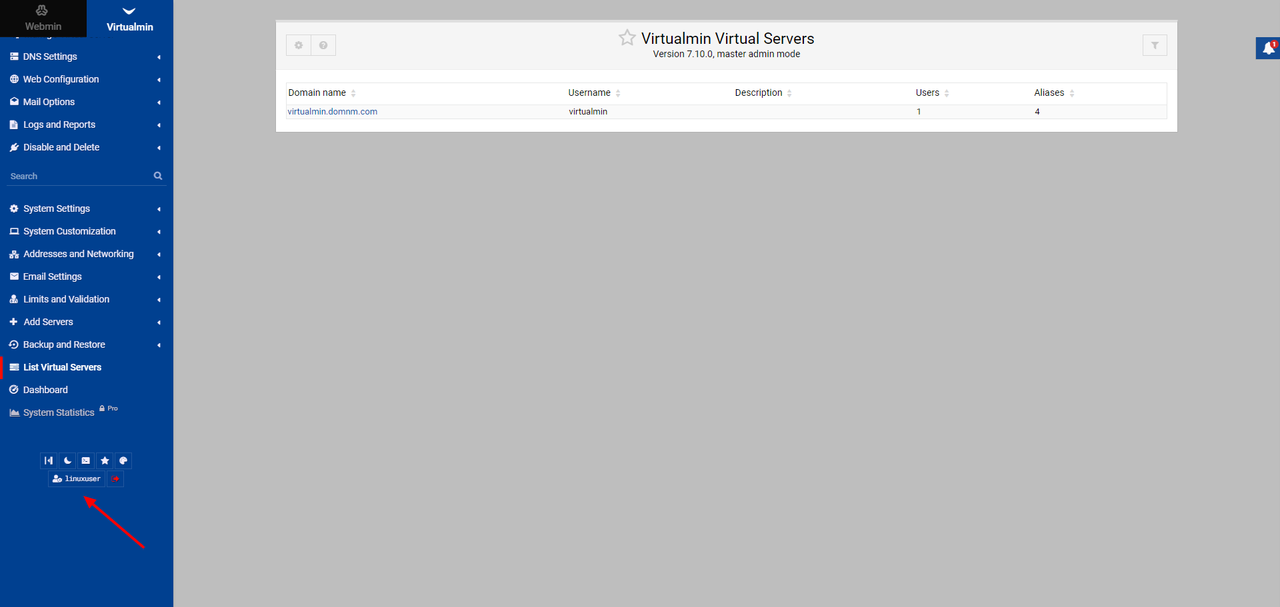
- Scroll down on the left navigation bar and click your username at the bottom of the page.
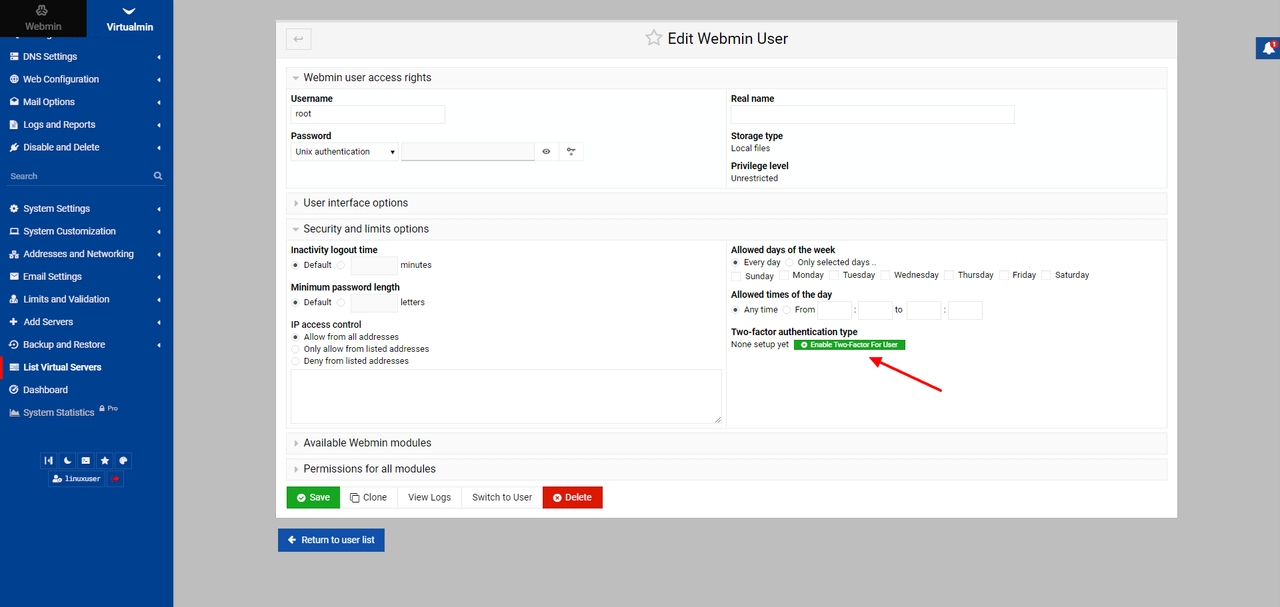
- Expand the Security and limits options section.
- Click Enable Two-Factor For User.
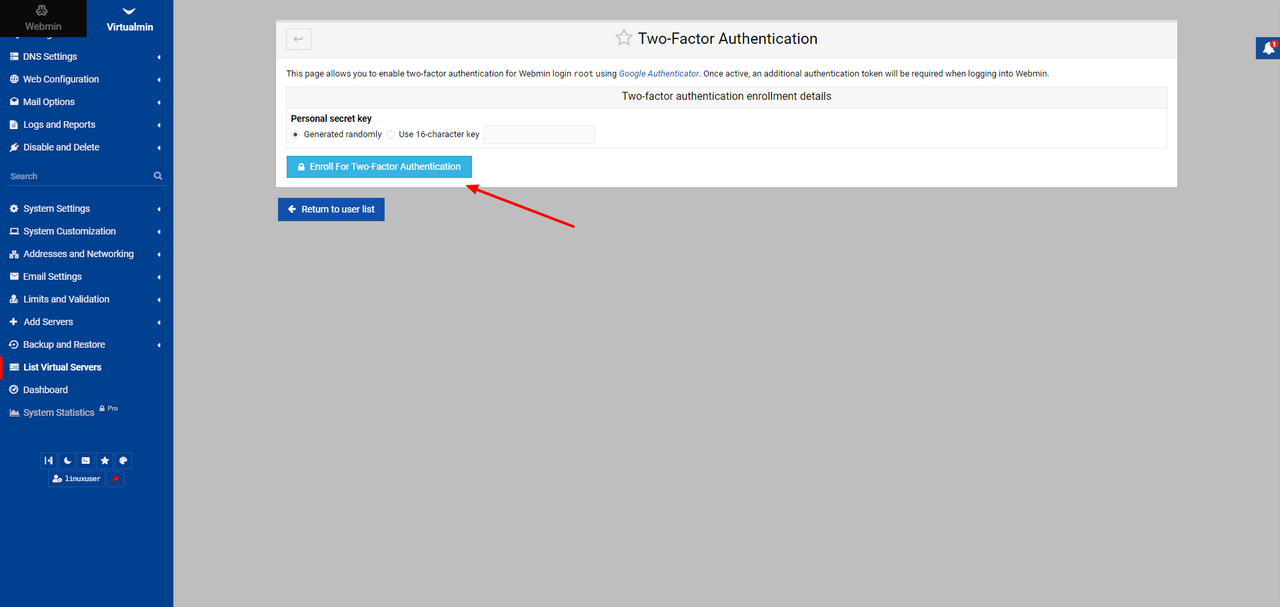
- Click Enroll For Two-Factor Authentication.
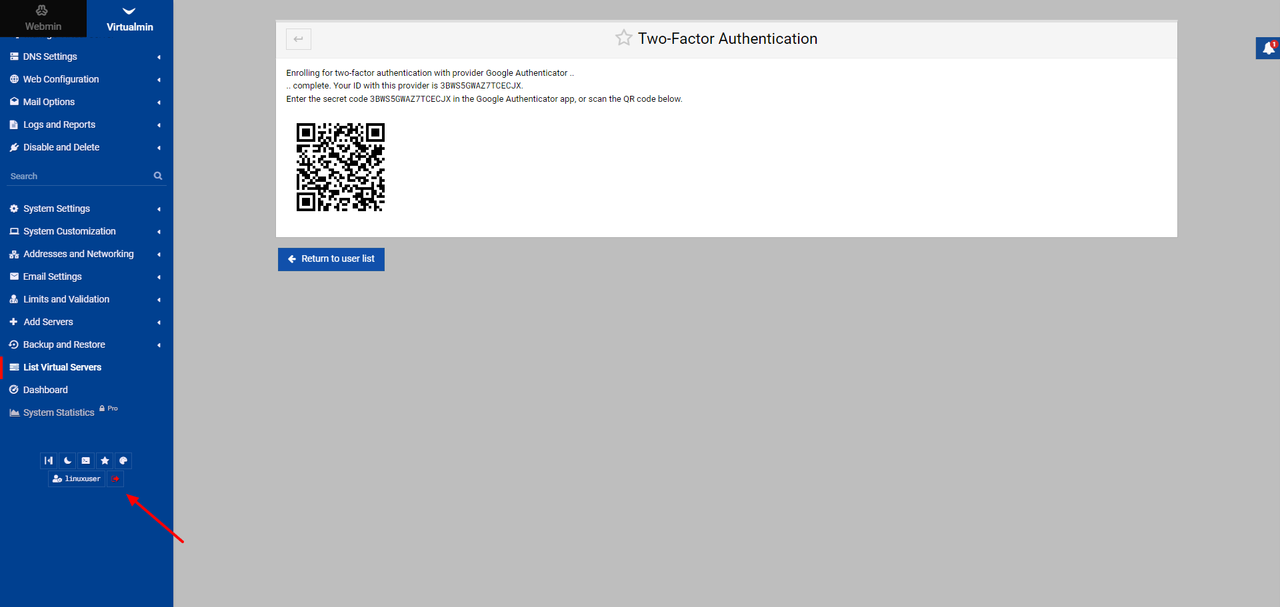
- Scan the displayed QR code on the page with your authenticator application.
- Scroll down on the left navigation bar to log out of Virtualmin.
- Log in with your non-root user credentials to test 2FA.

- Verify that Virtualmin requires the 2FA token to log in.
- Enter the 2FA token from the app.

- Press Verify to log in to the Virtualmin web administration interface.
Conclusion
In this article, you installed Virtualmin, created a website with automatic HTTPS via Let’s Encrypt, and secured it with 2FA. You also configured the Virtualmin firewall and closed unnecessary ports.
Prerequisites Have an Ubuntu 22.04 server. Create a domain name A record pointing to the server IP address. For example, virtualmin.example.com. Access the server using SSH as a non-root user with sudo privileges. Update the server. Install a 2FA application such as Google Authenticator on your device. Install Virtualmin Virtualmin is not available in Ubuntu…
Prerequisites Have an Ubuntu 22.04 server. Create a domain name A record pointing to the server IP address. For example, virtualmin.example.com. Access the server using SSH as a non-root user with sudo privileges. Update the server. Install a 2FA application such as Google Authenticator on your device. Install Virtualmin Virtualmin is not available in Ubuntu…