How to Install Caddy Web Server on Ubuntu 22.04
-
- 111
Prerequisites
Before you begin:
- Have an Ubuntu 22.04 server.
- Create a domain name A record pointing to the server IP address.
- Access the server using SSH as a non-root user with sudo privileges.
Install Caddy
Follow the steps in this section to download the latest Caddy repository information and install the application on your server.
- Add the latest Caddy GPG Key to your server.
console
$ curl -1sLf 'https://dl.cloudsmith.io/public/caddy/stable/gpg.key' | sudo gpg --dearmor -o /usr/share/keyrings/caddy-stable-archive-keyring.gpg
- Add the Caddy repository to your APT sources.
console
$ curl -1sLf 'https://dl.cloudsmith.io/public/caddy/stable/debian.deb.txt' | sudo tee /etc/apt/sources.list.d/caddy-stable.list
- Update the server package index.
console
$ sudo apt update - Install Caddy.
console
$ sudo apt install caddy - View the installed Caddy version to verify that the installation is successful.
console
$ caddy -vOutput:
v2.9.1 h1:OEYiZ7DbCzAWVb6TNEkjRcSCRGHVoZsJinoDR/n9oaY= - Allow incoming connections to the HTTP port
80through the firewall.console$ sudo ufw allow 80
- Restart the firewall to apply changes.
console
$ sudo ufw reload - Access your server IP to test access to the Caddy web server.
http://SERVER-IPConfirm that the default Caddy webpage displays in your browser.
Manage the Caddy System Service
- Enable the service to start at boot time.
console
$ sudo systemctl enable caddy
- Start the Caddy web server.
console
$ sudo systemctl start caddy - View the Caddy system service status to verify that the application is running.
console
$ sudo systemctl status caddyOutput:
● caddy.service - Caddy
     Loaded: loaded (/lib/systemd/system/caddy.service; enabled; vendor preset: enabled)
     Active: active (running) since Sun 2025-04-06 09:20:18 UTC; 4min 10s ago
       Docs: https://caddyserver.com/docs/
   Main PID: 3015 (caddy)
      Tasks: 9 (limit: 9415)
     Memory: 10.9M
     CGroup: /system.slice/caddy.service
             └─3015 /usr/bin/caddy run --environ --config /etc/caddy/Caddyfile
Create a Caddy Virtual Host
Caddy stores its configuration files in /etc/caddy by default but can use Caddyfile configurations from any location. Follow the steps in this section to create a new Caddy virtual host to serve web files from the /var/www/example.com directory.
- Create the
/var/www/example.comweb application files directory.console$ sudo mkdir -p /var/www/example.com - Create a new HTML application file
index.html.console$ sudo nano /var/www/example.com/index.html - Add the following code to the file.
html
<!DOCTYPE html>
<html>
<head>
    <meta charset="UTF-8">
    <title>Greetings from Vultr!</title>
</head>
<body>
    <br><br><br>
    <h1 style="text-align: center;">Hello World! Greetings from Vultr</h1>
</body>
</html>
Save and close the file.
- Switch to the Caddy configuration files directory.
console
$ cd /etc/caddy/
- Back up the default Caddyfile configuration.
console
$ sudo mv Caddyfile Caddyfile.default - Create a new Caddyfile configuration.
console
$ sudo nano Caddyfile - Add the following configurations to the file.
ini
example.com {
        tls admin@example.com

        root * /var/www/example.com

        file_server {
                index index.html
        }

        log {
                output file /var/log/caddy/example.log
                format console
        }
}
Save and exit the file.
The above Caddy configuration creates a new virtual host using your domain
example.com. Within the configuration:example.com: Defines a new virtual host using your domain or IP address.tls: Associates an email address with Let’s Encrypt SSL certificate requests.root: Specifies the directory for web application files.file_server: Enables the file server, withindexspecifying the default file to serve when accessed.log: Enables logging of access and errors to a file, such as/var/log/caddy/example.log.
- Test the Caddy configuration for errors.
console
$ sudo caddy validate - Reload the Caddy web server to apply your configuration changes.
console
$ sudo caddy reload
Secure the Caddy Web Server
Caddy automatically enables HTTPS to secure connections with SSL certificates for virtual hosts with valid domains. Follow the steps in this section to secure the Caddy web server by restricting access to the Caddyfile configurations from unauthorized changes.
- Grant the Caddy user full privileges to the
/etc/caddydirectory.console$ sudo chown -R caddy:caddy /etc/caddy - Grant the Caddy user read and write permissions to the Caddyfile while disabling access for other system users.
console
$ sudo chmod 660 /etc/caddy/Caddyfile
- Long list the
/etc/caddydirectory to verify the permission changes.console$ ls -l /etc/caddy/Output:
total 8
-rw-rw---- 1 caddy caddy 168 Jun 2 15:20 Caddyfile
-rw-r--r-- 1 caddy caddy 769 Jun  2 12:07 Caddyfle.default
Set Up Firewall Rules
Caddy uses HTTP port 80 and HTTPS port 443 based on your Caddyfile configurations to serve files. Follow the steps in this section to allow both Caddy ports through the firewall and enable network connections to the web server.
- View the UFW status and verify that it’s active.
console
$ sudo ufw statusIf the status is
inactive, allow the SSH port22and enable UFW.console$ sudo ufw allow 22 && sudo ufw enable
- Allow incoming connections to the HTTPS port
443.console$ sudo ufw allow 443
- Reload the firewall to apply changes
console
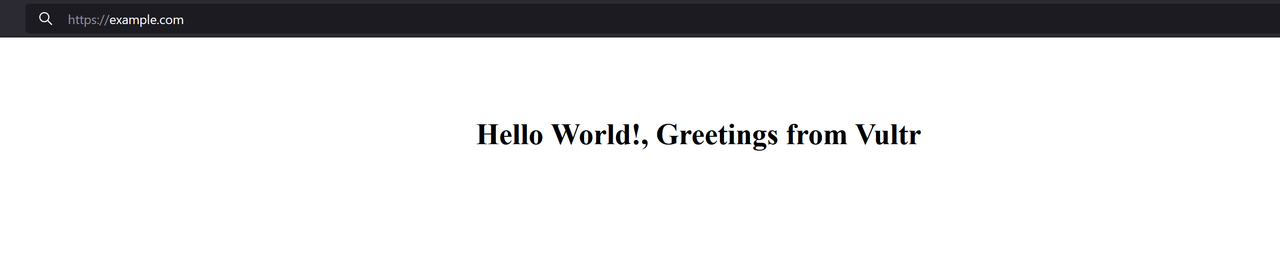
$ sudo ufw reload - Access your domain using a browser such as Chrome to verify that Caddy serves your virtual host web application fils.
https://example.comIf you receive a connection error, view the Caddy configuration logs to verify the error details.
Conclusion
In this article, you installed the Caddy web server on an Ubuntu 22.04 server and set up a virtual host profile to serve web application files on the server.
Prerequisites Before you begin: Have an Ubuntu 22.04 server. Create a domain name A record pointing to the server IP address. Access the server using SSH as a non-root user with sudo privileges. Install Caddy Follow the steps in this section to download the latest Caddy repository information and install the application…
Prerequisites Before you begin: Have an Ubuntu 22.04 server. Create a domain name A record pointing to the server IP address. Access the server using SSH as a non-root user with sudo privileges. Install Caddy Follow the steps in this section to download the latest Caddy repository information and install the application…