How to Deploy Redis® – In-Memory Data Store
How to Deploy Redis® – In-Memory Data Store
Deploy Redis® with Docker Compose on Ubuntu 24.04 with persistence and password security.
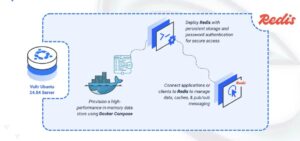
Redis® is an in-memory data store designed for low-latency access, supporting strings, lists, sets, sorted sets, streams, and pub/sub messaging. It is commonly used as a cache layer, message broker, and lightweight in-memory key-value database for high-throughput applications.
This article explains how to deploy Redis® with Docker Compose, enable data persistence, and secure it with a password.
Prerequisites
Before you begin, you need to:
- Have access to an Ubuntu 24.04-based server as a non-root user with
sudoprivileges. - Install Docker and Docker Compose.
Set Up the Directory Structure and Environment Variables
In this section, you create a project directory for Redis® and define environment variables in a .env file that Docker Compose loads automatically.
- Create the project directory.
console
$ mkdir -p ~/redis-stack/{data,conf}
- Navigate into the project directory.
console
$ cd ~/redis-stack
- Create a
.envfile to store the environment variables.console$ nano .envAdd the following variables:
iniREDIS_PASSWORD=STRONG_REDIS_PASSWORD REDIS_PORT=6379
Replace:
STRONG_REDIS_PASSWORDwith a secure alphanumeric password.REDIS_PORTwith your preferred port (default:6379).
Save and close the file.
- Create a Redis® configuration file.
console
$ nano conf/redis.confAdd the following Redis settings:
inibind 0.0.0.0 protected-mode yes port 6379 save 900 1 save 300 10 save 60 10000 dir /data dbfilename dump.rdb appendonly yes appendfilename "appendonly.aof"
Save and close the file.
Prepare the Host System for Redis®
In this section, you configure the host system to support reliable Redis® operations. Redis® requires memory overcommit to be enabled. Without this setting, background save operations or replication may fail, and the container may exit unexpectedly.
- Open the /etc/sysctl.conf file.
console
$ sudo nano /etc/sysctl.confAdd the following line to enable memory overcommit.
inivm.overcommit_memory = 1
Save and close the file.
- Apply the updated kernel parameters.
console
$ sudo sysctl -pOutput:
vm.overcommit_memory = 1This output confirms that the memory overcommit setting is active on your system.
Deploy with Docker Compose
In this section, you create the Docker Compose manifest that deploys Redis® with data persistence, loads your custom configuration file, and secures the server using a password defined in your .env file.
- Create the Docker Compose manifest.
console
$ nano docker-compose.yamlAdd the following content:
yamlservices: redis: image: redis:7.2 container_name: redis command: [ "redis-server", "/usr/local/etc/redis/redis.conf", "--requirepass", "${REDIS_PASSWORD}" ] ports: - "${REDIS_PORT}:6379" volumes: - "./data:/data" - "./conf/redis.conf:/usr/local/etc/redis/redis.conf:ro" environment: - REDIS_PASSWORD=${REDIS_PASSWORD} restart: unless-stopped healthcheck: test: ["CMD", "redis-cli", "-a", "${REDIS_PASSWORD}", "PING"] interval: 10s timeout: 3s retries: 5 start_period: 5s
Save and close the file.
In this manifest:
- services: Defines the containers managed by Docker Compose:
- redis: Runs the Redis® server with persistence enabled and password authentication enforced.
- image: Specifies the Redis® 7.2 container image.
- container_name: Assigns a fixed container name for easier management.
- command: Starts Redis® using your custom configuration file and applies the password using the
--requirepassdirective. - ports: Maps the container’s default Redis® port (
6379) to the host using the value from your.envfile. - volumes:
./datapersists Redis® data across container restarts../conf/redis.confinjects your custom Redis® configuration file into the container.
- environment: Exposes the Redis® password to the container runtime.
- healthcheck: Monitors container health by running a password-authenticated
PINGevery 10 seconds. - restart: unless-stopped: Ensures Redis® automatically restarts unless manually stopped.
- services: Defines the containers managed by Docker Compose:
- Start the Redis® service.
console
$ docker compose up -d - Verify that Redis® is running.
console
$ docker compose psEnsure that the output shows the Redis® container is healthy and running.
- View logs if needed.
console
$ docker compose logsFor more information on managing a Docker Compose stack, see the How To Use Docker Compose article.
Verify Redis® Connectivity
In this section, you verify that your Redis® instance is reachable and accepting authenticated commands.
- Install the Redis® CLI tool on the host.
console
$ sudo apt install redis-tools -y - Test the connection by sending an authenticated
PINGcommand.console$ redis-cli -h REDIS_HOST -p REDIS_PORT -a REDIS_PASSWORD PINGReplace:
REDIS_HOSTwith the IP address of your server.REDIS_PORTwith the Redis® service port you configured.REDIS_PASSWORDwith the password you set for authentication.
Output:
PONGThis confirms that Redis® is running, reachable, and correctly secured with your password.
Conclusion
You successfully deployed Redis® using Docker Compose with data persistence and password authentication. You configured the required environment variables, applied the necessary host settings, and launched Redis® with a custom configuration file. After verifying the container’s health and testing connectivity, the Redis® instance was fully operational and ready to use.