How to Change the Default Media Upload Location in WordPress
-
- 71
Do you want to change the default media upload location in WordPress?
Moving your media files to a different folder can improve your website’s speed and performance and help you create backups more quickly. It also gives you the freedom to organize your files in the way that best suits you.
In this article, we will show you how to change the default media upload location in WordPress.

Why Change the Default Media Upload Location?
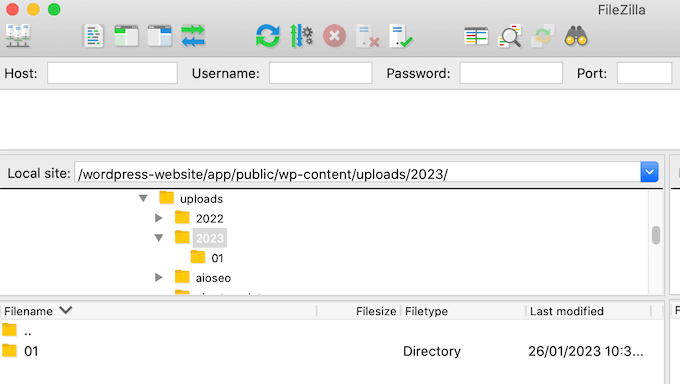
By default, WordPress stores all your images and other media files in the /wp-content/uploads/ folder.
Inside this folder, you’ll find sub-folders for the different years and months. For example, any files you uploaded in January 2023 will be stored in https://example.com/wp-content/uploads/2023/01/.
This default structure works well for most WordPress blogs and websites. However, sometimes you may want to change where WordPress stores your files. For example, you might host images on a subdomain, as this can speed up your WordPress performance.
Moving your media files to a different folder can also help you create backups more quickly.
Having said that, let’s take a look at how to change the default media upload location in WordPress, step-by-step.
Changing the Default Media Upload Location in WordPress
To change the media directory, you’ll need to add a code snippet to your WordPress website. That said, you may want to create a backup of your website before making any changes.
With that done, you’ll need to connect to your site using an FTP client such as FileZilla. If you haven’t used FTP before, then please see our beginner’s guide on how to use FTP to upload files to WordPress.
After connecting using FTP, simply create a new folder where you’ll store the media files. Make a note of the exact folder name, as you’ll be needing it in the next step.
Next, you’ll need to add a code snippet to WordPress. Often, WordPress tutorials will ask you to add custom code to your theme’s functions.php file.
The biggest problem is that even a tiny mistake in the custom code snippet can break your WordPress site or even make it inaccessible. Plus, you’ll lose all the custom code the next time you update your WordPress theme.
For that reason, we recommend using WPCode. WPCode is the most popular code snippets plugin that allows you to add custom CSS, PHP, HTML, and more, without putting your WordPress site at risk.
The first thing you need to do is install and activate the free WPCode plugin on your website. For more details, see our step-by-step guide on how to install a WordPress plugin.
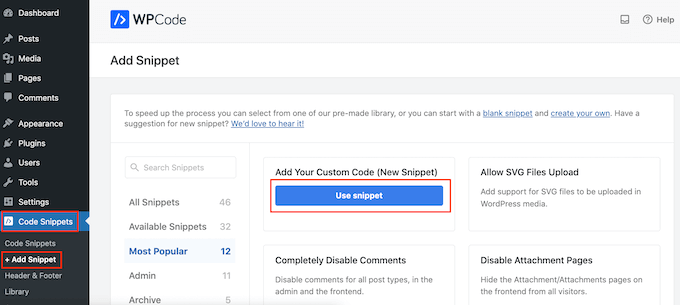
Upon activation, go to Code Snippets » Add Snippet in your WordPress dashboard.
On this screen, hover your mouse over ‘Add Your Own Custom Snippet’ and then click on ‘Use Snippet’ when it appears.
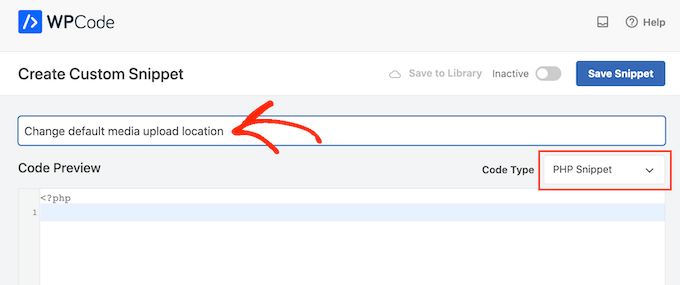
To start, type in a title for the code snippet. This is just for your reference, so you can use anything you want.
With that done, open the ‘Code Type’ dropdown and choose ‘PHP Snippet.’
You can now paste the following into the code editor:
| 1 | define( 'UPLOADS', 'wp-content/'.'files'); |
Hosted with ❤️ by WPCode
1-click Use in WordPress
The above snippet changes the upload directory to wp-content/files, so make sure to replace it with the location you want to use.
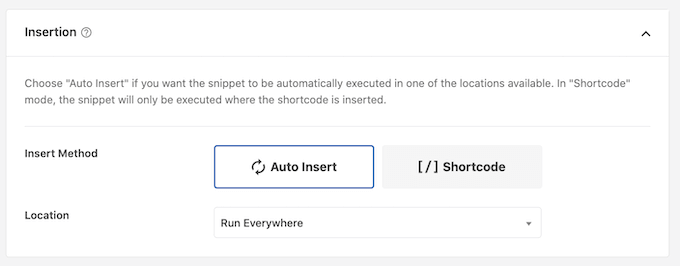
After that, scroll to the ‘Insertion’ box and select ‘Auto Insert’ if it isn’t selected already. You can then open the ‘Location’ dropdown and choose ‘Run Everywhere’ to make sure the snippet is active across your entire WordPress website.
With that done, scroll to the top of the screen and click on the ‘Inactive’ toggle so that it shows ‘Active.’
You can then go ahead and click on ‘Save Snippet’ to make the code live.

Now you’ve changed the media upload location, you may want to change how the files are organized inside this new folder.
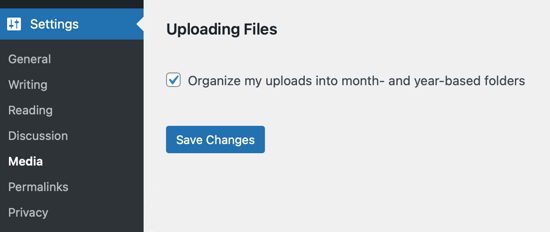
By default, WordPress stores all media files inside month and year folders. If you prefer to save all the files inside the same folder, then go to Settings » Media.
You can now uncheck the ‘Organize my uploads….’ box and click on ‘Save Changes.’
Now, WordPress will upload all your media files to the same folder. To see these files, simply connect to your site using an FTP client and then open the folder you selected.
For more information on troubleshooting WordPress upload issues, see our guide on how to fix common image issues in WordPress.
We hope this article helped you change the default media upload location in WordPress. You may also want to check out our guide on the most common WordPress errors and how to fix them, and the best SEO plugins and tools you should use.
Do you want to change the default media upload location in WordPress? Moving your media files to a different folder can improve your website’s speed and performance and help you create backups more quickly. It also gives you the freedom to organize your files in the way that best suits…
Do you want to change the default media upload location in WordPress? Moving your media files to a different folder can improve your website’s speed and performance and help you create backups more quickly. It also gives you the freedom to organize your files in the way that best suits…