How to Grayscale Images in WordPress
-
- 38
Are you wondering if there was a way to automatically grayscale images in WordPress when you upload them?
Usually, you need a photo editing tool to change your images to grayscale. However, this can be time-consuming as you’ll need to edit each individual image before uploading it to your website.
In this article, we will show you how to grayscale images in WordPress while uploading to your site.

When Should You Use Grayscale Images in WordPress?
Grayscale images only contain information about the amount of light in the picture. Image colors show different shades of grey, varying between black and white.
Under certain situations, using grayscale images can be beneficial for your WordPress website. For instance, you can use it to improve the readability of the objects shown in the image.
On the other hand, grayscale images are commonly used for image processing because of their small size. It allows developers to run complex operations in a shorter time.
That said, let’s see how you can turn your images to grayscale in WordPress when you upload them.
Graysacling Images on Upload in WordPress
When it comes to adding images in WordPress blog, you would have to edit them before uploading using a photo editing software like Photoshop and convert colored pictures to grayscale.
If you have hundreds or thousands of images to upload, then it can take a lot of time to edit each picture manually.
However, you can automatically turn them into grayscale images upon upload. To start, all you have to do is add the following code to your theme’s functions.php file:
| 12345678910111213141516171819202122232425262728293031323334 | add_filter('wp_generate_attachment_metadata','rb_bw_filter'); functionrb_bw_filter($meta) { $path= wp_upload_dir(); // get upload directory $file= $path['basedir'].'/'.$meta['file']; // Get full size image $files[] = $file; // Set up an array of image size urls foreach($meta['sizes'] as$size) { $files[] = $path['path'].'/'.$size['file']; } foreach($filesas$file) { // iterate through each image size // Convert image to grayscale credit to http://ottopress.com/2011/customizing-wordpress-images/ list($orig_w, $orig_h, $orig_type) = @getimagesize($file); $image= wp_load_image($file); imagefilter($image, IMG_FILTER_GRAYSCALE); switch($orig_type) { caseIMAGETYPE_GIF: imagegif( $image, $file); break; caseIMAGETYPE_PNG: imagepng( $image, $file); break; caseIMAGETYPE_JPEG: imagejpeg( $image, $file); break; } } return$meta;} |
Hosted with ❤️ by WPCode
1-click Use in WordPress
A simple way of adding code to theme files is by using the WPCode plugin for WordPress. It’s a free plugin that helps you run code snippets without the need to manually edit your theme’s function.php file.
Note: The free version of WPCode offers everything you need to easily add custom code in WordPress. For more advanced features like a private cloud snippet library, scheduled snippets, conversion pixels, and more, you can upgrade to WPCode Pro.
First, you’ll need to download and install the free WPCode plugin on your site. If you need help, then please follow our guide on how to install a WordPress plugin.
Upon activation, you can head over to Code Snippets » + Add New from your WordPress dashboard.
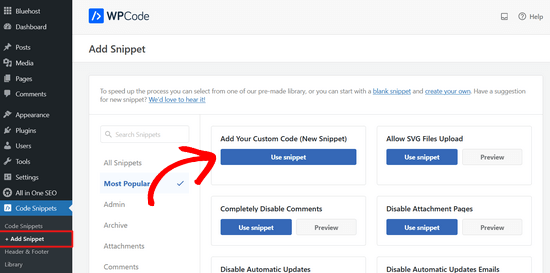
Then, navigate to the ‘Add Your Custom Code (New Snippet)’ option and click on the ‘Use snippet’ button.
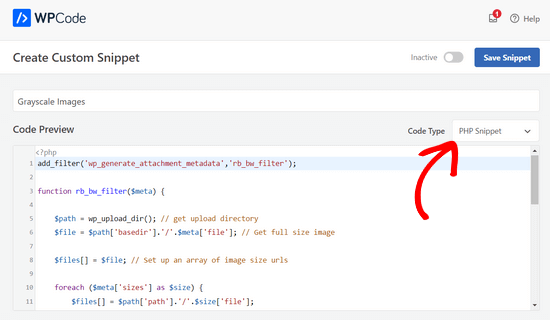
Next, go ahead and enter a name for your snippet and paste the above code in the ‘Code Preview’ area.
You also need to select ‘PHP Snippet’ as the code type from the dropdown list on the right.
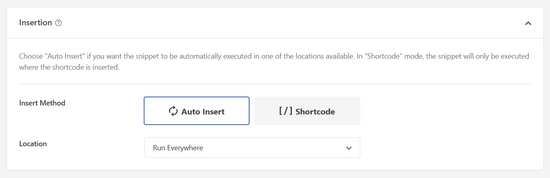
After entering the code, you can scroll down to the ‘Insertion’ section.
Here, you can leave the ‘Auto Insert’ option selected. This will automatically insert and execute the code for you.
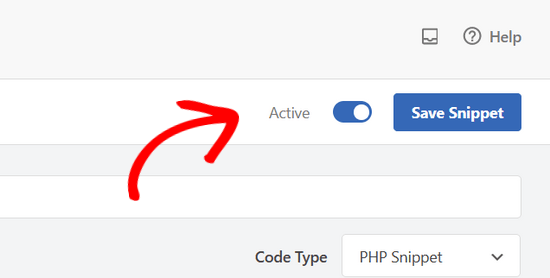
Lastly, go back to the top of the screen and toggle the switch to ‘Activate’ and click the ‘Save Snippet’ button.
Next, you can test the code by editing or adding a new page. When you’re in the WordPress editor, go ahead click the ‘+’ button and add an Image block.
You can now upload any image on your WordPress website and it will automatically convert into a grayscale image.
We hope this article helped you learn how to grayscale images in WordPress. You can also check out our guide on how to choose the best blogging platform and our expert picks of the best web design software.
Are you wondering if there was a way to automatically grayscale images in WordPress when you upload them? Usually, you need a photo editing tool to change your images to grayscale. However, this can be time-consuming as you’ll need to edit each individual image before uploading it to your website.…
Are you wondering if there was a way to automatically grayscale images in WordPress when you upload them? Usually, you need a photo editing tool to change your images to grayscale. However, this can be time-consuming as you’ll need to edit each individual image before uploading it to your website.…