Generating Images with Stable Diffusion | Generative AI Series

Introduction
Stable Diffusion is a text-to-image diffusion model developed by Stability AI. It is capable of generating high-quality, photorealistic images from text descriptions. Unlike other text-to-image models, Stable Diffusion generates consistent photos even when the input text description is complex or open-ended.
In this guide, you’ll set up the Stable Diffusion environment and query the model using a web user interface. Then, you’ll create a REST API to generate responses from the model and access the API through a Jupyter Notebook.
Prerequisites
Before you begin:
- Deploy a new Ubuntu 22.04 A100 Vultr Cloud GPU Server with at least:
- 80 GB GPU RAM
- 12 vCPUs
- 120 GB Memory
- Establish an SSH connection to the server.
- Create a non-root user with
sudorights and switch to the account. - Create a HuggingFace account.
- Create a Hugging Face user access token.
Install Dependency Packages
The Stable Diffusion requires some dependency packages to work. Install the packages using the following command:
CONSOLECopy$ sudo apt update $ sudo apt install -y wget git python3 python3-venv libgl1 libglib2.0-0
Run Stable Diffusion in a Web Interface
You can run the Stable Diffusion model in a web interface. Follow the steps below to download an automatic script that installs all the necessary packages. Then, load the model:
- Create a new
sddirectory and navigate to it.CONSOLECopy$ mkdir sd $ cd sd - Download the Stable Diffusion
webui.shfile.CONSOLECopy$ wget -q https://raw.githubusercontent.com/AUTOMATIC1111/stable-diffusion-webui/master/webui.sh - Add execute permissions to the
webui.shfile.CONSOLECopy$ sudo chmod +x ./webui.sh - Allow port
7860through the firewall.CONSOLECopy$ sudo ufw allow 7860 $ sudo ufw reload - Run the
webui.shscript to download the model and run the web interface.CONSOLECopy$ ./webui.sh –listen Output:... Model loaded in 18.6s (calculate hash: 10.6s, load weights from disk: 0.2s, create model: 1.9s, apply weights to model: 5.4s, apply half(): 0.1s, calculate empty prompt: 0.2s). - Visit the URL below. Replace
PUBLIC_IP_ADDRESSwith the public IP address of your GPU instance.http://PUBLIC_IP_ADDRESS:7860 - Type the following queries and review the output:
A cute white cat sitting next to a computer keyboardOutput: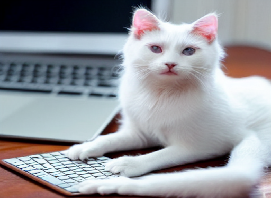
Taj Mahal during sunset, photo realistic, high qualityOutput:
Create a REST API for the Stable Diffusion Model
The bentoml library provides support for deploying and serving the Stable Diffusion model through an API. Follow the steps below to create and run an API:
- Use
pipto install the required libraries.CONSOLECopy$ pip install bentoml diffusers transformers accelerate pydantic - Navigate to the
sddirectory you created earlier.CONSOLECopy$ cd ~/sd - Create a new
fetch_sd.pyfile.CONSOLECopy$ nano fetch_sd.py - Enter the following information into the
fetch_sd.pyfile.PYTHONCopyimport bentoml bentoml.diffusers.import_model( “sd2.1”, “stabilityai/stable-diffusion-2-1”, ) - Create a new
service.pyfile.CONSOLECopy$ nano service.py - Enter the following information into the
service.pyfile. The following script loads a BentoML service that uses the Stable Diffusion model to convert text to image.PYTHONCopyimport bentoml from bentoml.io import Image, JSON from sdargs import SDArgs bento_model = bentoml.diffusers.get(“sd2.1:latest”) sd21_runner = bento_model.to_runner(name = “sd21-runner”) svc = bentoml.Service(“stable-diffusion-21”, runners=[sd21_runner]) @svc.api(input = JSON(pydantic_model = SDArgs), output = Image()) async def txt2img(input_data): kwargs = input_data.dict() res = await sd21_runner.async_run(**kwargs) images = res[0] return images[0] - Save and close the file.
- Create a new
sdargs.pyfile.CONSOLECopy$ nano sdargs.py - Enter the following information into the
sdargs.pyfile. The following script defines anSDArgsPydantic model that allows extra fields while inputting data. The script handles data validation in the application.PYTHONCopyimport typing as t from pydantic import BaseModel class SDArgs(BaseModel): prompt: str negative_prompt: t.Optional[str] = None height: t.Optional[int] = 512 width: t.Optional[int] = 512 class Config: extra = “allow” - Create a
service.yamlfileCONSOLECopy$ nano service.yaml - Enter the following information into the file.YAMLCopyservice: “service.py:svc” include: – “service.py” python: packages: – torch – transformers – accelerate – diffusers – triton – xformers – pydantic docker: distro: debian cuda_version: “11.6”
- Save and close the file
- Run the
fetch_sd.pyfile to pull the image from Hugging Face. This file allows thebentomllibrary to download the Stable Diffusion image and make it available locally. The command takes around 10 minutes to complete.CONSOLECopy$ python3 fetch_sd.py Output:Downloading (…)rocessor_config.json:... ... - List the models.CONSOLECopy$ bentoml models list
- Allow port
3000through the firewall.CONSOLECopy$ sudo ufw allow 3000 $ sudo ufw reload - Run the
bentomlservice.CONSOLECopybentoml serve service:svc - Save and close the file.
Access Stable Diffusion API from a Jupyter Notebook
After setting up a Stable Diffusion API in the previous section, you can now run a Python script to access the API using a Jupyter Notebook. Follow the steps below:
- Invoke a Jupypter lab service and retrieve your access
token.CONSOLECopy$ jupyter lab –ip 0.0.0.0 –port 8890 - Allow port
8890through the firewall.CONSOLECopy$ sudo ufw allow 8890 $ sudo ufw reload - Access the Jupyter Lab on a web browser. Replace
YOUR_SERVER_IPwith the public IP address of the GPU instance.http://YOUR_SERVER_IP:8890/lab?token=YOUR_TOKEN - Click Python 3 ipykernel under Notebook and paste the following Python code. The following script accesses the REST API to infer the Stable diffusion model. The script also provides a text prompt to the model with extra values like
heightandwidthto generate a response.PYTHONCopyimport requests from io import BytesIO from IPython.display import Image, display url = “http://127.0.0.1:3000/txt2img” headers = {‘Content-Type’: ‘application/json’} data = { “prompt”: “a black cat”, “height”: 768, “width”: 768 } response = requests.post(url, headers = headers, json = data) display(Image(response.content)) Output: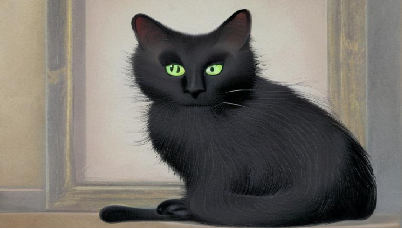
Conclusion
In this guide, you’ve used the Stable Diffusion model to generate images using text inputs. You’ve run the model’s functionalities using a web interface and later used a Jupyter Notebook to access the REST API.