Deploy Chatwoot on Vultr Kubernetes Engine using Helm Charts
Introduction
Chatwoot is an open-source customer engagement platform designed to improve business processes. You can integrate the application with multiple communication channels such as email, website live chat, and social media applications to manage all customer communications in a single dashboard.
This guide explains how to deploy Chatwoot on a Vultr Kubernetes Engine (VKE) cluster using Helm Charts. To extend the Chatwoot functionalities, you will integrate Vultr Object Storage, a Vultr Managed Database for PostgreSQL, and a Vultr Managed Database for Redis to run the application in your cluster.
Prerequisites
Before you begin:
- Deploy a Vultr Kubernetes Engine (VKE) Optimized Cloud Compute cluster with at least
3nodes - Deploy a Vultr Managed Database for PostgreSQL to store Chatwoot database values
- Deploy a Vultr Managed Database for Redis
- Deploy a Vultr Object Storage instance to store critical Chatwoot data
- Deploy a Vultr Ubuntu server to use as the management instance
- Access the server using SSHas a non-root user with sudo privileges
- Install and Configure Kubectl to access your VKE cluster
- Install the Helm package manager:CONSOLECopy$ sudo snap install helm –classic
- Install the PostgreSQL
psqlclient tool to access the database:CONSOLECopy$ apt install postgresql-client
Set Up the Chatwoot Database
- Log in to your Vultr Managed Database for PostgreSQL. Replace
vultradmin,postgres-334h.vultrdb.com, and5432with your actual database details.CONSOLECopy$ psql -h postgres-334h.vultrdb.com -p 5432 -U vultradmin You can find your Vultr Database for PostgreSQL details in the connection details section on your cluster control panel.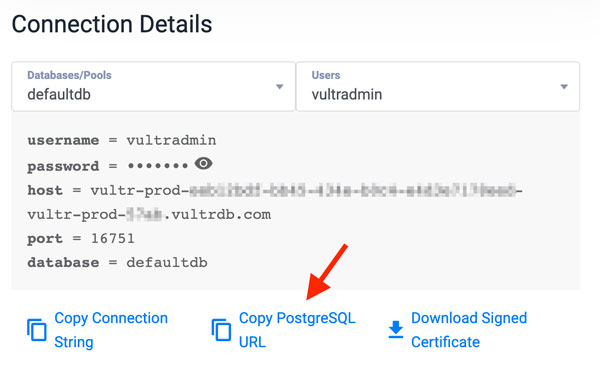
- Create a new Chatwoot database.SQLCopydefaultdb=> CREATE DATABASE chatwoot;
- Create a new database user. For example
exampleuserwith a strong password.SQLCopydefaultdb=> CREATE USER exampleuser WITH PASSWORD ‘strong-password’; - Grant the user full privileges to the Chatwoot database.SQLCopydefaultdb=> GRANT ALL PRIVILEGES ON DATABASE chatwoot TO exampleuser;
- Exit the PostgreSQL database console.SQLCopydefaultdb=> \q
Set Up the VKE Cluster
To deploy Chatwoot to your cluster, install the Nginx Ingress controller to handle incoming requests, and Cert-Manager to handle the certificate issuance process to your configured domain name. Set up the project directory, download the default Chatwoot configuration file, and install all necessary packages to your cluster as described in the steps below.
- Create a new
chatwoot-appdirectory.CONSOLECopy$ mkdir chatwoot-app - Switch to the directory.CONSOLECopy$ cd chatwoot-app
- Download the default Chatwoot Helm configuration values file.CONSOLECopy$ wget https://raw.githubusercontent.com/chatwoot/charts/main/charts/chatwoot/values.yaml The
values.yamlfile contains default configurations and environment variables you should modify before deploying Chatwoot in a cluster. - Using Helm, add the Chatwoot repository to your server.CONSOLECopy$ helm repo add chatwoot https://chatwoot.github.io/charts
- Add the Nginx Ingress Controller repository.CONSOLECopy$ helm repo add ingress-nginx https://kubernetes.github.io/ingress-nginx
- Add the Cert-Manager repository.CONSOLECopy$ helm repo add jetstack https://charts.jetstack.io
- Update your Helm Repositories to fetch the latest Chart information.CONSOLECopy$ helm repo update
- Install the Nginx Ingress Controller to your cluster.CONSOLECopy$ helm install ingress-nginx ingress-nginx/ingress-nginx
- Install Cert-Manager to handle the SSL certificate operations.CONSOLECopy$ helm install cert-manager jetstack/cert-manager –namespace cert-manager –create-namespace –set installCRDs=true
- When successful, view the cluster services and verify the Load Balancer external IP address assigned to your Ingress Controller.CONSOLECopy$ kubectl get services ingress-nginx-controller Output:
NAME TYPE CLUSTER-IP EXTERNAL-IP PORT(S) AGE ingress-nginx-controller LoadBalancer 10.96.132.148 192.168.10.1 80:30827/TCP,443:30274/TCP 6m9sIf the external IP is in<pending>state, wait for at least3minutes and view the cluster services again. - Access your domain DNS records and create a new A record that points to your load balancer external IP address.
Modify the Chatwoot Configuration Values
- Using the OpenSSL utility, generate a random secret key.CONSOLECopy$ openssl rand -hex 32 Copy the random key generated in your output like the one below:
632830c6d5a23e46d73bdc362dd05d34c85d969b4ab0f5f675e8ea6d7dfaa335 - Using a text editor such as Nano, open the
values.yamlfile.CONSOLECopy$ nano values.yaml - Find the
SECRET_KEY_BASEdeclaration in theenvsection.YAMLCopySECRET_KEY_BASE: replace_with_your_super_duper_secret_key_base Replace the default value with the string key you generated earlier. For example:YAMLCopySECRET_KEY_BASE: 632830c6d5a23e46d73bdc362dd05d34c85d969b4ab0f5f675e8ea6d7dfaa335 Save and close the file.
Configure Vultr Object Storage
Follow the steps in this section to add Vultr Block Storage to your Chatwoot configuration to store chat attachments within the application.
- Create a new bucket on your Vultr Object Storage. For example
chatwoot-data.
- Edit the
values.yamlfile.CONSOLECopy$ nano values.yaml - Find the
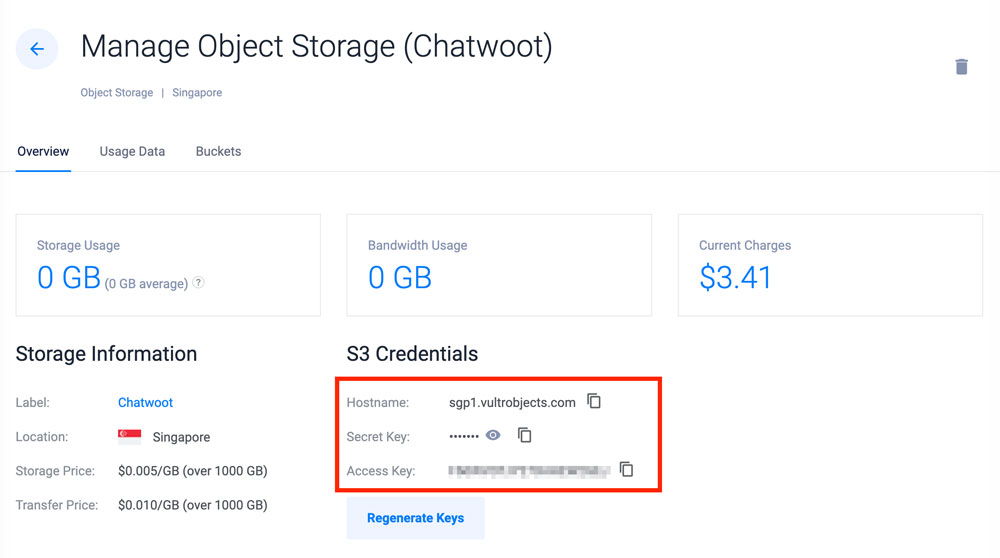
ACTIVE_STORAGE_SERVICEdeclaration in theenv:section, and change the value fromlocaltos3_compatible.YAMLCopyACTIVE_STORAGE_SERVICE: s3_compatible - Scroll to the end of the file, and add the following declarations.Replace the example values with your actual Vultr Object Storage details:YAMLCopySTORAGE_BUCKET_NAME: chatwoot-prod STORAGE_ACCESS_KEY_ID: vultr-object-storage-access-key STORAGE_SECRET_ACCESS_KEY: vultr-object-storage-secret-key STORAGE_REGION: ewr1 STORAGE_ENDPOINT: https://ewr1.vultrobjects.com Save and close the file.Below is what each of the above YAML declarations represent:
STORAGE_BUCKET_NAME: Your Vultr Object Storage bucket nameSTORAGE_ACCESS_KEY_ID: Your Vultr Object Storage Access KeySTORAGE_SECRET_ACCESS_KEY: The Vultr Object Storage Secret KeySTORAGE_REGION: Defines your Vultr Object Storage deployment region.ewr1represents the Vultr New Jersey region. You can identify your Object Storage region depending on your host URL. For example, theewr1region usesewr1.vultrobjects.comSTORAGE_ENDPOINT: Sets your Vultr Object Storage Hostname with secure access over HTTPS
Set Up the Vultr Managed Database for PostgreSQL Connection
- Edit the
values.yamlfile.CONSOLECopy$ nano values.yaml - Find the following
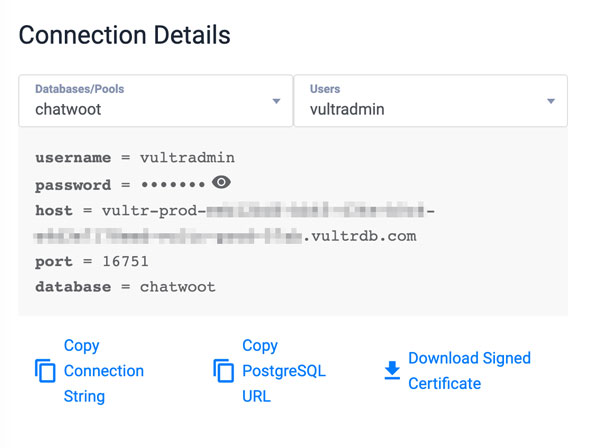
postgresqlsection:YAMLCopypostgresql: enabled: true nameOverride: chatwoot-postgresql auth: username: postgres postgresPassword: postgres database: chatwoot_production # when existingSecret is defined auth.password, auth.PostgressPassword # is ignored. # existingSecret: secret-name # secretKeys: # adminPasswordKey: postgres-password # replicationPasswordKey: replication-password # The following variables are only used when internal PG is disabled # postgresqlHost: postgres # postgresqlPort: 5432 - Set the
enabledvalue tofalse, and replace the default values with your actual Vultr Managed Database for PostgreSQL details similar to the ones below:YAMLCopypostgresql: enabled: false nameOverride: chatwoot-postgresql auth: username: exampleuser postgresPassword: strong-password database: chatwoot # when existingSecret is defined auth.password, auth.PostgressPassword # is ignored. # existingSecret: secret-name # secretKeys: # adminPasswordKey: postgres-password # replicationPasswordKey: replication-password # The following variables are only used when internal PG is disabled postgresqlHost: postgres-334h.vultrdb.com postgresqlPort: 5432 Save and close the file.Below is what the PostgreSQL section declarations represent:enabled: Sets the database type Chatwoot should use. When set tofalse, Chatwoot uses your Vultr Managed Database for PostgreSQL instead of deploying a cluster PostgreSQL podusername: Defines your PostgreSQL database usernamepostgresPassword: Defines the PostgreSQL user password to use for connecting to the databasedatabase: Sets the PostgreSQL Chatwoot databasepostgresqlHost: Sets the Vultr Managed Database for PostgreSQL host URL to connect the Chatwoot databasepostgresqlPort: Sets your PostgreSQL database port to connect using the database host URL
Enable the Vultr Managed Database for Redis Connection to handle Queues and Cache Storage
- Edit the
values.yamlfile.CONSOLECopy$ nano values.yaml - Find the following
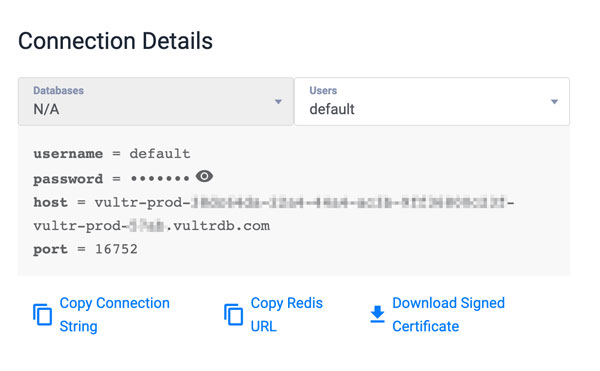
redissection.YAMLCopyredis: enabled: true nameOverride: chatwoot-redis auth: password: redis # when defined the password field is ignored # existingSecret: secret-name # existingSecretPasswordKey: “” # The following variables are only used when internal Redis is disabled # host: redis # Just omit the password field if your redis cluster doesn’t use password # password: redis # port: 6379 master: persistence: enabled: true # If change pvc size redis.master.persistence.size: 20Gi replica: replicaCount: 1 - Set the
enabled:value tofalse, and replace the default values with your actual Vultr Managed Database for Redis details.YAMLCopyredis: enabled: false nameOverride: chatwoot-redis auth: password: redis # The following variables are only used when internal Redis is disabled host: [VULTR_REDIS_HOSTNAME] # Just omit the password field if your redis cluster doesn’t use password password: [VULTR_REDIS_PASSWORD] port: [VULTR_REDIS_PORT] master: persistence: enabled: true replica: replicaCount: 1 Below is what the database values represent:enabled: Sets the Chatwoot Redis database server location. When set tofalse, Chatwoot uses the Vultr Managed Database values and disables the internal cluster Redis podshost: Defines your Vultr Managed Database for Redis host URL.password: Sets your Vultr Managed Database for Redis password. Iignore thepassworddeclaration in theauthsection because it’s only used with the cluster Redis installation.port: Sets your Vultr Managed Database for Redis port to connect to the database host.
- Scroll to the
envsection and set theREDIS_TLSvalue totrue.YAMLCopyREDIS_TLS: true Save and close the file.
Add Nginx Ingress Configurations to the Chatwoot Helm Configuration File
To correctly route and forward incoming external traffic to your Chatwoot application, modify the services and ingress sections as described in the steps below.
- Edit the
values.yaml.CONSOLECopy$ nano values.yaml - Find the following
servicesparameter.YAMLCopyservices: name: chatwoot internalPort: 3000 targetPort: 3000 type: LoadBalancer annotations: {} Change thetypedeclaration value fromLoadBalancertoClusterIP:YAMLCopytype: ClusterIP The modifiedservicessection should look like the one below:YAMLCopyservices: name: chatwoot internalPort: 3000 targetPort: 3000 type: ClusterIP annotations: {} - Find the following
ingresssection.YAMLCopyingress: enabled: false # For Kubernetes >= 1.18 you should specify the ingress-controller via the field ingressClassName # See https://kubernetes.io/blog/2020/04/02/improvements-to-the-ingress-api-in-kubernetes-1.18/#specifying-the-class-of-an-ingress # ingressClassName: nginx annotations: {} # kubernetes.io/ingress.class: nginx # kubernetes.io/tls-acme: “true” hosts: – host: “” paths: – path: / pathType: Prefix backend: service: name: chatwoot port: number: 3000 tls: [] # – secretName: chart-example-tls # hosts: # – chart-example.local Change theenabledvalue fromfalsetotrue.YAMLCopyenabled: true Remove the#comment value on theingressClassNamedeclaration to activate the Nginx Ingress Controller.YAMLCopyingressClassName: nginx Within theannotationssection, uncomment thekubernetes.io/ingress.classannotationYAMLCopyannotations: kubernetes.io/ingress.class: nginx Scroll to thehostssection and replace thehostvalue with your Chatwoot domain name. Replacechatwoot.example.comwith your actual domain name that points to the Ingress Controller Load Balancer External IP Address.YAMLCopyhosts: – host: chatwoot.example.com paths: – path: / pathType: Prefix backend: service: name: chatwoot port: number: 3000 Save and close the file.The modifiedingresssection should look like the one below:YAMLCopyingress: enabled: true # For Kubernetes >= 1.18 you should specify the ingress-controller via the field ingressClassName # See https://kubernetes.io/blog/2020/04/02/improvements-to-the-ingress-api-in-kubernetes-1.18/#specifying-the-class-of-an-ingress ingressClassName: nginx annotations: kubernetes.io/ingress.class: nginx # kubernetes.io/tls-acme: “true” hosts: – host: chatwoot.example.com paths: – path: / pathType: Prefix backend: service: name: chatwoot port: number: 3000 tls: [] # – secretName: chart-example-tls # hosts: # – chart-example.local - Using Helm, install Chatwoot with the
values.yamlconfigurations to your Vultr Kubernetes Engine cluster.CONSOLECopy$ helm install chatwoot chatwoot/chatwoot -f values.yaml When successful, your output should look like the one below:NAME: chatwoot LAST DEPLOYED: Mon Oct 16 16:05:24 2023 NAMESPACE: default STATUS: deployed REVISION: 1 NOTES: Thank you for installing chatwoot. Your release is named chatwoot. To learn more about the release, try: $ helm status chatwoot $ helm get all chatwoot NOTE: It may take a few minutes for the LoadBalancer IP to be available. You can watch the status by running 'kubectl get svc -w chatwoot' export SERVICE_IP=$(kubectl get svc --namespace default chatwoot -o jsonpath='{.status.loadBalancer.ingress[0].ip}') echo http://$SERVICE_IP:3000- The deployment should take about 10 minutes to complete depending on your cluster node type.
- If you receive the following deployment error:
Error: INSTALLATION FAILED: failed post-install: timed out waiting for the condition
values.yamlfile. - View your cluster pods and verify that all Chatwoot pods are running.CONSOLECopy$ kubectl get pods Output:
NAME READY STATUS RESTARTS AGE chatwoot-web-666b5bdb69-vp5bd 1/1 Running 0 2m55s chatwoot-worker-ffccccd4-4j8l4 1/1 Running 0 2m55s chatwoot-worker-ffccccd4-n6272 1/1 Running 0 2m55s ingress-nginx-controller-84bd4cb7ff-h8ght 1/1 Running 0 4m54sVerify that all pods are ready and running in your cluster to use your Chatwoot application.
Generate Let’s Encrypt SSL Certificates using Cert-Manager
- Create a new Let’s Encrypt issuer resource file. For example
chatwoot-issuerto use as Let’s Encrypt Issuer.CONSOLECopy$ nano production-issuer.yaml - Add the following configurations to the file. Replace
admin@example.comwith your actual email address.YAMLCopyapiVersion: cert-manager.io/v1 kind: Issuer metadata: name: chatwoot-prod spec: acme: server: https://acme-v02.api.letsencrypt.org/directory email: admin@example.com privateKeySecretRef: name: chatwoot-prod solvers: – http01: ingress: class: nginx Save and close the file. - Deploy the issuer to your cluster.CONSOLECopy$ kubectl apply -f production-issuer.yaml
- View the cluster issuers and verify that the new resource is available.CONSOLECopy$ kubectl get issuer Output:
NAME READY AGE chatwoot-prod True 39s - To use the new Certificate Issuer, edit your
values.yamlfile.CONSOLECopy$ nano values.yaml - Find the
ingresssection and uncomment thetlsdeclaration values.YAMLCopytls: – secretName: chart-example-tls hosts: – chart-example.local Replace the default values with your actual details. For example, replacechart-example.localwith your actual Chatwoot domain name, andchart-example-tlswith your desired secret name.YAMLCopytls: – secretName: chatwoot-cert-secret hosts: – chartwoot.example.com - Add the cert-manager issuer annotation to your
annotationssection to use the newtlssection values.YAMLCopycert-manager.io/issuer: letsencrypt-prod Save and close the file.Your modified Ingress section should look like the one below:YAMLCopyingress: enabled: true # For Kubernetes >= 1.18 you should specify the ingress-controller via the field ingressClassName # See https://kubernetes.io/blog/2020/04/02/improvements-to-the-ingress-api-in-kubernetes-1.18/#specifying-the-class-of-an-ingress ingressClassName: nginx annotations: kubernetes.io/ingress.class: nginx cert-manager.io/issuer: letsencrypt-prod # kubernetes.io/tls-acme: “true” hosts: – host: newchat.onlustech.com paths: – path: / pathType: Prefix backend: service: name: chatwoot port: number: 3000 tls: – secretName: chartwoot-cert-secret hosts: – chartwoot.example.com - Upgrade the Chatwoot application with your new
values.yamlconfiguration.CONSOLECopy$ helm upgrade chatwoot chatwoot/chatwoot -f values.yaml When succesful, your output should look like the one below:Release "chatwoot" has been upgraded. Happy Helming! NAME: chatwoot LAST DEPLOYED: Mon Oct 16 16:25:12 2023 NAMESPACE: default STATUS: deployed REVISION: 2 NOTES: Thank you for installing chatwoot. Your release is named chatwoot. To learn more about the release, try: $ helm status chatwoot $ helm get all chatwoot NOTE: It may take a few minutes for the LoadBalancer IP to be available. You can watch the status by running 'kubectl get svc -w chatwoot' export SERVICE_IP=$(kubectl get svc --namespace default chatwoot -o jsonpath='{.status.loadBalancer.ingress[0].ip}') echo http://$SERVICE_IP:3000 - Verify that all pods are running.CONSOLECopy$ kubectl get pods Output:
NAME READY STATUS RESTARTS AGE pod/cert-manager-55657857dd-lp9dh 1/1 Running 0 6m1s pod/cert-manager-cainjector-7b5b5d4786-8wqnb 1/1 Running 0 6m1s pod/cert-manager-webhook-55fb5c9c88-d5wlq 1/1 Running 0 6m1s pod/chatwoot-web-666b5bdb69-vp5bd 1/1 Running 0 16m pod/chatwoot-worker-ffccccd4-4j8l4 1/1 Running 0 16m pod/chatwoot-worker-ffccccd4-n6272 1/1 Running 0 16m pod/ingress-nginx-controller-84bd4cb7ff-h8ght 1/1 Running 0 18m
Test: Access your Chatwoot Application
- Using a web browser such as
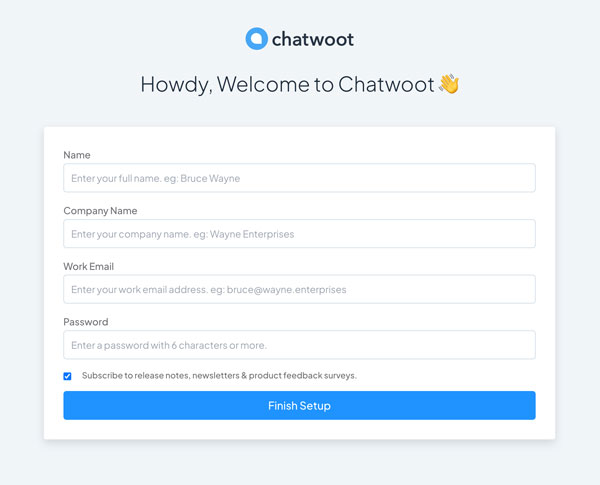
Firefox, access your Chatwoot domain name.https://chatwoot.example.com - Verify that the Chatwoot onboarding page displays in your browser.
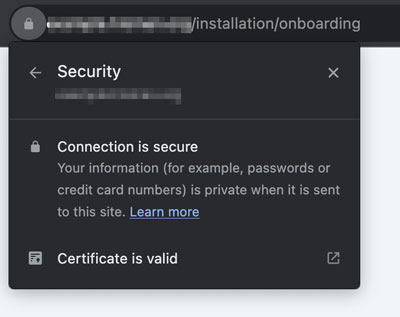
- Verify that your domain name uses a valid SSL certificate.
- Fill in the Name, Company Name, Email and Password fields with your details. Then, click Finish Setup to save the new administrator details.
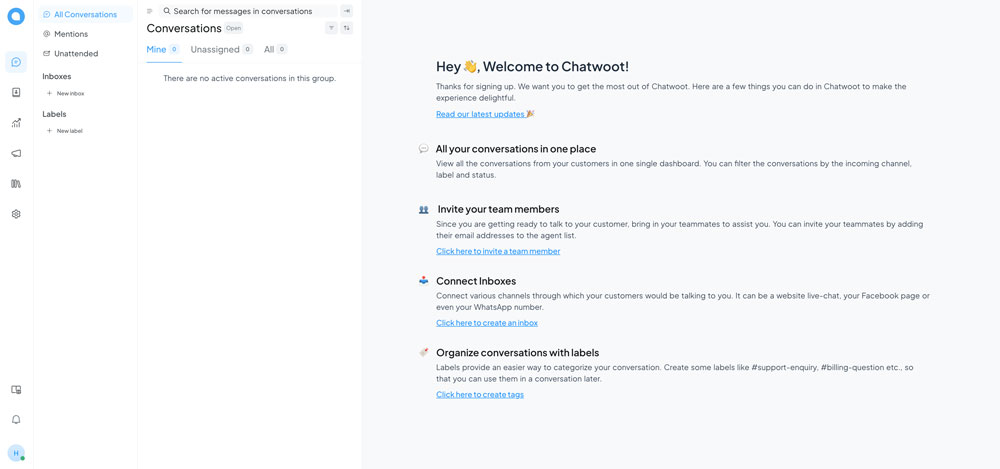
- Login to Chatwoot using your administrator email and password to access the application dashboard.
Conclusion
You have deployed a Chatwoot instance to a Vultr Kubernetes Engine (VKE) cluster using Helm. In addition, you integrated a Vultr Managed Database for PostgreSQL, Vultr Object Storage and a Vultr Managed Database for Redis to extend the Chatwoot production environment functionalities.