How to Create a Sudo User in Linux
-
- 34
Learn how to create a sudo user on Linux, manage permissions, and customize sudo behavior securely.
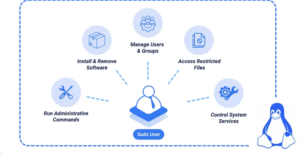
Creating a sudo user allows a non-root user to perform administrative tasks with elevated privileges. Instead of logging in as root, the user authenticates with their password, and the system securely logs each command they run. This approach improves system security by limiting root access and providing better accountability. Most Linux distributions follow a similar process for adding sudo users, with slight group names or package requirements variations.
This article explains how to create a sudo user on major Linux distributions, verify their privileges, and apply optional security settings to control sudo behavior.
Prerequisites
Before you begin, you need to:
- Have access to a Linux instance as a non-root sudo user.
Create a Sudo User
In this section, you will create a new user and grant them sudo privileges. While the exact steps may vary slightly between distributions, most follow a similar process. Start by choosing the section that matches your Linux distribution.
On Red Hat-based systems, users gain sudo access by being added to the wheel group, which is predefined in the instance sudoers configuration. This group based approach helps centralize administrative permissions and improve security by controlling who can execute privileged commands.
- Create a new user.
console
$ sudo useradd -m example_userIn the above command, the
-moption ensures a home directory is created at/home/example_user. Replaceexample_userwith your desired username. - Set a password for the user.
console
$ sudo passwd example_userYou’ll be prompted to enter and confirm a secure password. The system stores this encrypted password in
/etc/shadow, which is readable only by privileged users. - Add the user to the
wheelgroup.console$ sudo usermod -aG wheel example_userThe above command grants
sudoaccess by adding the user to thewheelgroup.- The
-aoption appends the user to the group without removing them from any existing groups. - The
-Gflag specifies the group name.
- The
- Open the
/etc/sudoersfile withvisudoto verify that thewheelgroup hassudoprivileges.console$ sudo visudoUnlike a regular text editor,
visudoperforms syntax validation before saving changes. This helps prevent configuration errors that could lock you out of the system. - Locate the following line and make sure it is uncommented.
ini
...
## Allows people in group wheel to run all commands
%wheel  ALL=(ALL)       ALL
...
The above directive allows users in the
wheelgroup to run any command withsudo. Its components mean:%wheel: Applies to the wheel group (% indicates a group).First ALL: Applies to all hosts.(ALL): Allows running commands as any user.Last ALL: Allows running any command.
NoteAlways use
visudoto edit the sudoers file. Editing it directly with a standard text editor can result in syntax errors that breaksudofunctionality. - Switch to the newly created user account.
console
$ sudo su - example_userThe hyphen (
-) ensures that the user’s full environment is loaded, including updated PATH variables. - Run the
whoamicommand withsudoto verify administrative access.console$ sudo whoamiOutput:
rootThe output
rootconfirms that the configuration is correct and the user hassudoprivileges.
Debian-based systems, such as Ubuntu and its derivatives, manage administrative privileges using the sudo group rather than wheel. In this section, you will create a new user, assign sudo access, and verify that the configuration works as expected.
- Create a new user.
console
$ sudo adduser example_userThe
adduserutility is interactive and user-friendly. It creates the home directory, prompts for a password, and optionally collects user metadata like full name and contact information. - Add the user to the
sudogroup.console$ sudo usermod -aG sudo example_userBy default, members of the
sudogroup have administrative privileges on Debian and Ubuntu systems. This configuration is defined in the/etc/sudoersfile and included by default. - Switch to the newly created user account.
console
$ sudo su - example_userThe
-flag ensures the new user environment is fully loaded, including the updated group membership. - Run the
whoamiutility usingsudoto print the effective user name.console$ sudo whoamiOutput:
rootIf the output returns
root, the user has successfully been grantedsudoprivileges.
Arch Linux’s environment requires manual configuration of administrative access. In this section, you’ll create a new user, assign them to the wheel group, and configure the sudoers file to enable sudo privileges.
- Create a new user.
console
$ sudo useradd --create-home example_userIn the above command, the
--create-homeflag ensures the system creates a home directory for the user. Replaceexample_user. - Set a password for the user.
console
$ sudo passwd example_userWhen prompted, enter and confirm a strong password. The system securely stores the password in encrypted form in the
/etc/shadowfile, which is readable only by therootuser. - Add the user to the
wheelgroup.console$ sudo usermod --append --groups wheel example_userArch Linux uses the
wheelgroup to controlsudoaccess, similar to Red Hat-based systems. - Install the
vieditor, which thevisudoutility requires.console$ sudo pacman --sync vi - Update the
sudoersfile.console$ sudo visudoFind the following line and ensure it is uncommented.
ini... %wheel ALL=(ALL) ALL ...
This enables all users in the
wheelgroup to use thesudoutility. - Switch to the newly created user.
console
$ sudo su - example_userThen verify
sudoaccess:console$ sudo whoamiOutput:
rootThis confirms that
sudois configured for the new user.
Test Sudo User Privileges in Linux
After setting up a sudo user, verify that the account has administrative privileges. This section walks you through several tests to confirm proper sudo functionality.
Run Basic Commands with Sudo
Run these commands to ensure the user can perform administrative tasks.
- View the
rootuser’s home directory.console$ sudo ls -la /rootThis command displays hidden and regular files in
/root, which onlyrootor users withsudoprivileges can access. - Update the server package lists.
- On Debian-based systems (Ubuntu, Debian):
console
$ sudo apt update - On Red Hat-based systems (RHEL, CentOS, Fedora):
console
$ sudo dnf makecache - On Arch Linux:
console
$ sudo pacman -Sy
Package management commands require
rootprivileges because they modify system files and packages. If these commands work without errors, yoursudosetup is functioning. - On Debian-based systems (Ubuntu, Debian):
Verify Access to Protected Files
Confirm that your sudo user can access sensitive files restricted to root.
$ sudo cat /etc/shadow
The /etc/shadow file contains encrypted user passwords and is critical for system security. It’s only readable by root or users with sudo privileges, so viewing it confirms your sudo privileges are working.
Check Sudo Logs
sudo maintains detailed logs of all activity, which is crucial for security auditing and accountability.
- On Debian-based systems, run:
console
$ sudo grep sudo /var/log/auth.log - On Red Hat systems, run:
console
$ sudo grep sudo /var/log/secure
These logs record when users run sudo, who ran it, and which commands they executed. This audit trail is a key security advantage of using sudo instead of directly operating as the root user.
Manage Password Prompts for a Sudo User
In this section, you will configure how and when sudo prompts for a password, allowing you to fine-tune the balance between security and convenience.
Configure Password Timeout
By default, sudo caches your credentials for 15 minutes. Follow the steps below to customize this timeout to suit your workflow.
- Open the
sudoersfile using thevisudoutility.console$ sudo visudo - Add or modify the following line.
ini
Defaults timestamp_timeout=30
This example sets the timeout to 30 minutes. This value determines how long sudo remembers your authentication after a successful password entry.
Special values for
timestamp_timeout:0: Require the password for everysudocommand.-1: Never prompt again during the session.- Positive integers (for example,
5,15,30): Define the authentication timeout in minutes.
Behind the scenes,
sudocreates timestamp files in/var/run/sudo/or/var/lib/sudo/to track when users last authenticated.
Set Up Passwordless Sudo
For automation tasks or controlled environments, you can allow specific users or groups to execute sudo commands without being prompted for a password.
- Open the
sudoersfile.console$ sudo visudo - Add a rule for the user.
ini
example_user ALL=(ALL) NOPASSWD: ALL
Or configure it for an entire group:
ini%wheel ALL=(ALL) NOPASSWD: ALL
WarningEnabling password-less
sudoreduces security by eliminating authentication prompts. Use it only in secure environments with fully trusted users.
Limit Command Execution
Following the principle of least privilege, restrict which commands users can execute with sudo.
- Edit the
sudoersfile.console$ sudo visudo - Define explicit command permissions.
ini
example_user ALL=(ALL) /usr/bin/apt update, /usr/bin/apt upgrade
This configuration allows the user to run only the specified commands with
sudo. Use absolute paths, assudodoes not resolve commands through$PATH.To locate a command’s full path, run:
console$ which <command>For example:
console$ which mkdirOutput:
/usr/bin/mkdir
Create Command Aliases
In multi-user environments, command aliases can simplify the privilege definitions.
- Open the
sudoersfile.console$ sudo visudo - Define command groups and assign them.
ini
# Command Aliases
Cmnd_Alias UPDATES = /usr/bin/apt update, /usr/bin/apt upgrade
Cmnd_Alias SERVICES = /usr/bin/systemctl restart apache2

# User Privileges
example_user ALL=(ALL) UPDATES, SERVICES
Command aliases let you group related commands under a single name, making the sudoers file more organized and maintainable as it grows.
Conclusion
You have successfully created and configured a sudo user across major Linux distributions. You granted administrative privileges by assigning the user to the appropriate group (wheel or sudo) and verified access through protected commands. You also reviewed ways to enforce secure privilege escalation by customizing the sudoers file, such as restricting commands, enabling password-less access, and setting timeout and retry limits. With these configurations, your system now has properly managed sudo access, enhancing usability and security.
Learn how to create a sudo user on Linux, manage permissions, and customize sudo behavior securely. Creating a sudo user allows a non-root user to perform administrative tasks with elevated privileges. Instead of logging in as root, the user authenticates with their password, and the system securely logs each command they run.…
Learn how to create a sudo user on Linux, manage permissions, and customize sudo behavior securely. Creating a sudo user allows a non-root user to perform administrative tasks with elevated privileges. Instead of logging in as root, the user authenticates with their password, and the system securely logs each command they run.…