How to Deploy Bitwarden – Password Management Vault
How to Deploy Bitwarden – Password Management Vault
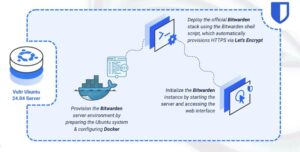
Deploy the official Bitwarden server on Ubuntu using Docker with automatic TLS security.
Bitwarden is a secure, open-source password management platform designed for individuals, teams, and organizations of all sizes. It provides encrypted vault storage, multi-device syncing, organization management, and strong administrative controls for managing credentials across environments. Running Bitwarden on your own server allows you to manage users, organizations, and secrets with full oversight.
This article demonstrates how to deploy the official Bitwarden server stack on Ubuntu 24.04. This deployment utilizes the official shell script wrapper to orchestrate the Docker containers and automatically handles TLS certificates via Let’s Encrypt.
Prerequisites
The official Bitwarden server infrastructure is robust and resource-intensive. Ensure your server meets the following requirements before proceeding:
- Have access to an Ubuntu 24.04 server as a non-root user with sudo privileges. The system should have at least 2 GB of system memory. The recommended memory is 4 GB.
- Install Docker and Docker Compose.
- Configure a domain name, such as
bitwarden.example.com, to point to your server’s public IP address. - Obtain a free Installation ID and Installation Key from the Request Hosting Installation Id & Key page.
Prepare the Environment
The installation script performs Docker operations that require specific permissions. You must prepare the user environment and installation directory.
- Add your current user to the
dockergroup.console$ sudo usermod -aG docker $USER
- Refresh your group membership.
console
$ newgrp docker - Create the directory where Bitwarden will be installed.
console
$ sudo mkdir -p /opt/bitwarden - Grant ownership of the directory to your current user.
console
$ sudo chown -R $USER:$USER /opt/bitwarden
- Navigate to the directory.
console
$ cd /opt/bitwarden
Download and Install Bitwarden
Bitwarden provides a shell script that automates the downloading, configuration, and updating of the necessary Docker containers.
- Download the official installation script.
console
$ curl -Lso bitwarden.sh https://go.btwrdn.co/bw-sh - Make the script executable.
console
$ chmod 700 bitwarden.sh
- Run the installer.
console
$ ./bitwarden.sh install - The script prompts you for configuration details. Enter the following values:
- Enter the domain name for your Bitwarden instance: Enter your domain (e.g.,
bitwarden.example.com). - Do you want to use Let’s Encrypt to generate a free SSL certificate?
y - Enter your email address: Enter a valid email address for Let’s Encrypt certificate renewal notifications.
- Enter the database name:
vault. - Enter your installation id: Paste the Installation ID you obtained from the prerequisites.
- Enter your installation key: Paste the Installation Key.
- Enter your region:
USorEU.
The script pulls multiple Docker images (including Nginx, Microsoft SQL Server, and various Bitwarden microservices). This process may take several minutes.
- Enter the domain name for your Bitwarden instance: Enter your domain (e.g.,
Start the Server
Once the installation script completes, the environment is configured. However, the containers are not yet running.
- Start the Bitwarden instance.
console
$ ./bitwarden.sh start - Verify the container status.
console
$ docker container lsYou should see a list of containers, such as
bitwarden/nginx...,bitwarden/mssql...,bitwarden/web..., with a status ofUp.
Create Your First User
The installation process configures the infrastructure but does not create a user account. The email address provided during installation was for TLS registration. You must register a new user to become the administrator.
- Open your web browser and navigate to your domain
https://bitwarden.example.com.
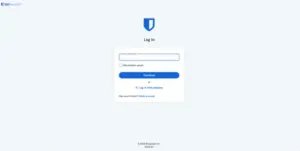
2.Click the Create account link at the bottom of the login box.
3.Fill in your Email, Name, Master password, and the Master password hint.
Do not lose your Master Password. Bitwarden uses zero-knowledge encryption. If you lose this password, your data cannot be recovered by you or the server administrator.
4.Submit the form. You will be redirected to the Login screen.
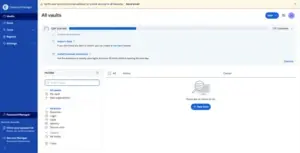
5.Log in using your new credentials to access your vault.
Conclusion
You have successfully deployed the Official Bitwarden Server on Ubuntu 24.04. Your instance is fully compatible with all Bitwarden client applications (Mobile, Desktop, Browser) and is secured with auto-renewing TLS certificates. For more information, refer to the Bitwarden documentation.