How to Deploy Unbound – Validating DNS Resolver
How to Deploy Unbound – Validating DNS Resolver
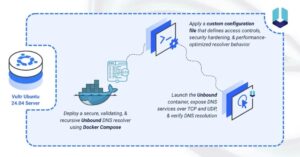
Deploy a secure, validating Unbound DNS resolver on Ubuntu 24.04 using Docker Compose.
Unbound is a validating, recursive, and caching DNS resolver. Unlike some other DNS servers that rely on heavy web interfaces, Unbound is designed to be lean, fast, and secure. It rigorously validates DNSSEC signatures to ensure the authenticity of the data it serves, making it a preferred choice for privacy-conscious users and enterprise environments.
This article demonstrates how to deploy Unbound DNS Server on Ubuntu 24.04 using Docker Compose.
Prerequisites
Before you begin:
- Have access to an Ubuntu 24.04 server as a non-root user with sudo privileges.
- Install Docker and Docker Compose.
Freeing Port 53
DNS servers communicate using port 53. By default, Ubuntu 24.04 runs its own internal DNS service called systemd-resolved on this port. You must disable this internal service so that Unbound can take control of port 53.
Additionally, you need to ensure the server itself can still connect to the internet to download updates, even if Unbound is stopped. To do this, you will configure the server to use a public DNS provider.
- Stop the
systemd-resolvedservice.console$ sudo systemctl stop systemd-resolved - Disable the service so it does not start again when you reboot.
console
$ sudo systemctl disable systemd-resolved - Remove the existing DNS configuration file.
console
$ sudo rm /etc/resolv.conf - Create a new DNS configuration file.
console
$ echo "nameserver 1.1.1.1" | sudo tee /etc/resolv.conf
Set Up the Directory Structure and Configuration File
Unbound relies on a configuration file to define its behavior, access controls, and security features. You must create the necessary directory structure to store this file.
- Create the project directory.
console
$ mkdir -p ~/unbound - Navigate to the directory.
console
$ cd ~/unbound
- Create the
unbound.confconfiguration file.console$ nano unbound.conf - Add the following configuration content. Replace
YOUR_CLIENT_IPwith the public IP address of the client device that will query this server. To allow multiple clients, add additionalaccess-controllines.yamlserver: interface: 0.0.0.0 interface: ::0 port: 53 access-control: 127.0.0.0/8 allow access-control: 192.168.0.0/16 allow access-control: 172.16.0.0/12 allow access-control: 10.0.0.0/8 allow access-control: YOUR_CLIENT_IP/32 allow access-control: 0.0.0.0/0 refuse hide-identity: yes hide-version: yes use-caps-for-id: yes prefetch: yes num-threads: 2 msg-cache-slabs: 4 rrset-cache-slabs: 4 infra-cache-slabs: 4 key-cache-slabs: 4 rrset-cache-size: 100m msg-cache-size: 50m so-rcvbuf: 1m remote-control: control-enable: no
Save and close the file.
This configuration defines Unbound’s security posture, access rules, and performance behavior:
- Listening Interfaces: Unbound listens on all IPv4 and IPv6 interfaces so it can accept DNS queries from allowed clients.
- Access Control: Controls who may query your resolver.
- Private ranges allow internal communication (including Docker networks).
YOUR_CLIENT_IP/32represent individual clients.- Everything else (
0.0.0.0/0) is explicitly denied for safety.
- Security Settings:
hide-identityandhide-versionprevent Unbound from revealing software details.use-caps-for-idadds DNS query randomization to prevent spoofing attacks.prefetchrefreshes items in cache before expiration.
- Performance Tuning: Optimized cache sizes, slab counts, and thread counts improve speed and reduce latency on small-to-medium servers.
- Remote Control Disabled: Prevents external control commands for increased security.
Deploy with Docker Compose
This section sets up the Unbound deployment using the popular mvance/unbound Docker image.
- Create the Docker Compose manifest file.
console
$ nano docker-compose.yml - Add the following contents. Replace
UTCwith your preferred timezone.yamlservices: unbound: image: mvance/unbound:latest container_name: unbound restart: unless-stopped environment: TZ: UTC ports: - "53:53/tcp" - "53:53/udp" volumes: - ./unbound.conf:/opt/unbound/etc/unbound/unbound.conf:ro
Save and close the file.
This Docker Compose configuration deploys a standalone Unbound server that listens directly on standard DNS ports. Each setting plays a specific function in the deployment:
unbound service
- Runs the container using the community-maintained
mvance/unboundimage. - Exposes ports
53/tcpand53/udpto allow standard DNS queries from your allowed clients. - Mounts your local
unbound.conffile into the container at/opt/unbound/etc/unbound/unbound.conf. The:roflag ensures the container reads the file as read-only, preventing accidental changes from inside the container. - Restarts automatically (
unless-stopped) to ensure high availability after server reboots.
- Runs the container using the community-maintained
- Start the service in detached mode.
console
$ docker compose up -d - Check the container status.
console
$ docker compose ps
Testing
Verify that the Unbound server is functioning correctly by querying it directly.
- Run this command from your client’s terminal. Replace
SERVER_IPwith your server’s public IP address.console$ dig @SERVER_IP vultr.comYou should see a standard DNS response with an A record of vultr.com
Conclusion
You have successfully deployed Unbound DNS Server on Ubuntu 24.04. You now have a high-performance, validating recursive resolver. You can further customize the unbound.conf file to add local zones, blocklists, or advanced caching rules.