How to Install TrueNAS on a Vultr Cloud VPS
-
- 129
Introduction
TrueNAS is an open-source file storage and sharing system, and the successor to FreeNAS.
- FreeNAS is available in the Vultr ISO library.
- TrueNAS CORE is available as a free download from truenas.com.
This guide explains how to install a TrueNAS server on Vultr’s cloud VPS hosting. All references in this guide refer to TrueNAS, but you can also install FreeNAS a Vultr cloud server with these instructions.
Prerequisites
- Create at least four Block Storage volumes in the same location, such as New Jersey or Los Angeles.
- Download the latest TrueNAS Core ISO.
- Follow our guide to upload the ISO to Vultr.
Note: If you prefer to install FreeNAS, you can use the ISO in the Vultr ISO library and skip the ISO upload steps.
Deploy a New VPS
TrueNAS is based on FreeBSD, which needs custom VPS settings at Vultr. The easiest way to get a FreeBSD-compatible VPS is to deploy a FreeBSD 12.2 server, then attach the ISO and reformat the original server.
- Deploy a new FreeBSD 12.2 Cloud Compute or High-Frequency Compute cloud VPS server. TrueNAS requires a server with Block Storage, which is unavailable on Dedicated Cloud or Bare Metal instances.
When configuring your server:
- Choose the same Vultr location as your block storage volumes.
- Select Block Storage Compatible in the Additional Features section.
- Select a plan with at least 8 GB of RAM.
Use more RAM for better performance if you have large storage volumes.
- Wait for your server to deploy.
- Navigate to the Block Storage section of the Customer Portal.
- Attach your Block Storage volumes to your new instance.
- Navigate to the server information page.
- Choose the Setting tab.
- Click the Custom ISO menu.
- Select an ISO.
If you uploaded a TrueNAS ISO, you’ll find it in the Custom ISO section. The FreeNAS ISO is available in the ISO Library section.
- Click Attach ISO and Reboot.
- Connect to the Vultr web console.

- Choose Install/Upgrade.
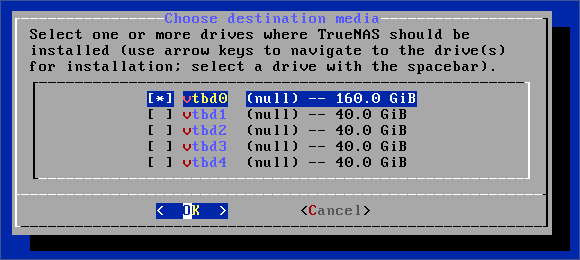
- Select the first drive as the installation location.
- Choose Yes to proceed with the installation.
- Enter a strong root password.
- Choose Boot via BIOS.
- Choose Create Swap.
- Wait for the installation to complete.

- Navigate to the Server information page in the customer portal.
- Click the Settings tab.
- Click the Custom ISO menu.
- Click Remove ISO. The server will reboot.
- Navigate to your server’s IP address in a web browser. For example:
http://192.0.2.123
- Log in as root with the password you chose during installation.
- Navigate to Storage -> Pools.
- Click ADD to add a new storage pool.
- Choose Create new pool, then click CREATE POOL.
- Enter a name for your pool.
- Click SUGGEST LAYOUT to use all available disks.
- Click CREATE.
- Confirm your choice at the warning prompt.


TrueNAS will format your disks and create a storage pool.
Introduction TrueNAS is an open-source file storage and sharing system, and the successor to FreeNAS. FreeNAS is available in the Vultr ISO library. TrueNAS CORE is available as a free download from truenas.com. This guide explains how to install a TrueNAS server on Vultr’s cloud VPS hosting. All references in this…
Introduction TrueNAS is an open-source file storage and sharing system, and the successor to FreeNAS. FreeNAS is available in the Vultr ISO library. TrueNAS CORE is available as a free download from truenas.com. This guide explains how to install a TrueNAS server on Vultr’s cloud VPS hosting. All references in this…