How to Use Vultr Managed Databases for MySQL with NodeJS
Introduction
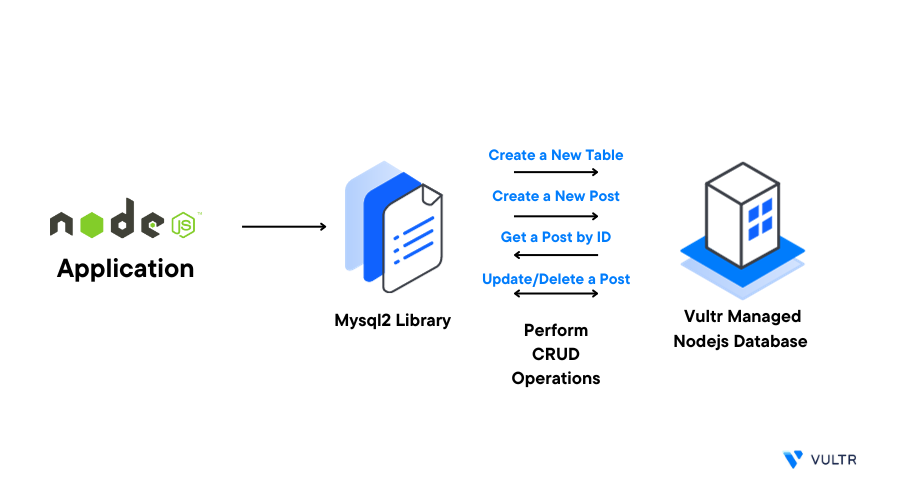
Node.js is a Javascript runtime environment that allows you to build highly scalable applications with support for popular relational database systems such as MySQL. You can integrate a Vultr Managed Database for MySQL with your Node.js application to make it highly available and scalable.
Follow the steps in this guide to use a Vultr Managed Database for MySQL with Node.js. You will create a sample Node.js project, and use the mysql2 library to connect to the deployed database. In addition, execute queries to view the database data using your application.
Prerequisites
Before you begin, make sure you:
- Deploy a Vultr Managed Database for MySQL cluster
- Install Node.js version 16 or higher using NVMon your development machine
- Have some basic Node.js and MySQL usage skills
Set Up the Project
- Create a new project directory
$ mkdir project - Switch to the new
projectdirectory.$ cd project - Using
npm, initialize your project$ npm init -yThe above command creates a newpackage.jsonfile in the directory that contains all important information about the project including the metadata and project dependencies - Install the project dependencies
$ npm i mysql2 dotenvThe above command installs themysql2package that allows Node.js application to interact with MySQL databases. Thedotenvpackage loads environment variables such as database connections from a.envfile to yourprocess.envobject. - View the
package.jsonfile and verify that all dependency packages are available to the project$ cat package.jsonYour output should look like the one below with different version numbers:"dependencies": { "dotenv": "^16.3.1", "mysql2": "^3.6.0" } - Create the main project
index.jsfile$ touch index.js - Using a text editor such as Nano, create a new
.envfile to store the database information values$ nano .env - Add the following variables to the file. Replace the example values with your actual Vultr Managed Database for MySQL details
DB_HOSTNAME = example.prod.vultrdb.com DB_PORT = 167521 DB_USER = example-user DB_PASSWORD = strong-passwrd DB_NAME = example-dbSave and close the file.
Connect to the Database
To connect your Node.js application to the MySQL database, use the mysql2 library to use your .env file details as described in the steps below.
- Open and edit the
index.jsfile$ nano index.js - Add the following code to the file
- Import the project dependencies
require('dotenv').config() const mysql = require('mysql2');
mysql2module, and thedotenvmodule that reads the contents of your.envfile, then forwards the contents toprocess.env.- Create a new object to store database connection details from the
process.envvariable.const dbConfig = { host: process.env.DB_HOSTNAME, port: process.env.DB_PORT, user: process.env.DB_USER, password: process.env.DB_PASSWORD, database: process.env.DB_NAME, }; - Create a database connection
connectToDB()methodlet db; const connectToDB = async () => { const pool = mysql.createPool(dbConfig); const poolPromise = pool.promise(); return poolPromise; }
createPool()connection method creates a pool of connections to the database. Themysql2module supports the following two methods:createConnection(): Creates one-time connection to execute queries. One connection can only handle one query at a time. The Next time a query executes, the application re-establishes a connection to the database againcreatePool(): Creates a pool of connections to the database. Connection pooling enhances the performance of executing the commands on a database. Instead of establishing a new connection every time the application only executes a query and gets a connection from the pool
pool.promise()wraps the pool object into a promise-based version, and provides a version of the pool that returns promises. This makes it possible to use theasync/awaitsyntax for cleaner, and more readable asynchronous code- Create the
main()method to call theconnectToDB()function with aConnected to Databaseresult when successfulconst main = async () => { db = await connectToDB(); console.log('Connected to database'); } - Call the
main()method at the end of the filemain(); - Save and close the file
- Your complete
index.jsshould look like the one below:require('dotenv').config() const mysql = require('mysql2'); const dbConfig = { host: process.env.DB_HOSTNAME, port: process.env.DB_PORT, user: process.env.DB_USER, password: process.env.DB_PASSWORD, database: process.env.DB_NAME, }; let db; const connectToDB = async () => { const pool = mysql.createPool(dbConfig); const poolPromise = pool.promise(); return poolPromise; } const main = async () => { db = await connectToDB(); console.log('Connected to database'); } main();
index.jsfile connects your Node.js application to the deployed MySQL database on Vultr and assigns the promise-based pool to thedbvariable which supports CRUD operations. - Import the project dependencies
- Run the
index.jsfile to start the Node.js application$ node index.jsOutput:Connected to database
Interact with the MySQL Database Using Node.js
To test your Node.js application functionality, create a new table in the connected database and perform CRUD operations using SQL queries as described in the steps below.
Create a New Table
- Open and edit the
index.jsfile$ nano index.js - Edit the
connectToDB()method beforereturn poolPromise;, and include a query that creates a newpoststable using theCREATE TABLE IF NOT EXISTSSQL statementconst connectToDB = async () => { const pool = mysql.createPool(dbConfig); const poolPromise = pool.promise(); //SQL query await poolPromise.query("CREATE TABLE IF NOT EXISTS `posts` (`id` int NOT NULL AUTO_INCREMENT, `title` varchar(255) NOT NULL, `body` varchar(255) NOT NULL, `author` varchar(255), PRIMARY KEY (`id`) );") const [allPosts, fields] = await poolPromise.query('SELECT * FROM posts;'); console.log(`Posts Table: ${JSON.stringify({ allPosts, fields })}`); return poolPromise; }Save and close the file.The above code creates a new MySQL table with the following columns:id: Automatically increments every new record with unique values using it’s Primary Keytitleandbodycolumns accept all characters (VARCHAR) and can store up to 255 charactersauthor: Supports all characters with up to 255 characters
const [allPosts, fields] = await poolPromise.query('SELECT * FROM posts;')query selects all records from thepoststable. Thequerymethod returns an array where the first element is an array of rows from the query (assigned toallPosts), and the second element is an array of field metadata (assigned tofields). - Run the application
$ node index.jsYour output should look like the one below:34,0]},"_clientEncoding":"utf8","_catalogLength":3,"_catalogStart":167,"_schemaLength":9,"_schemaStart":171,"_tableLength":5,"_tableStart":181,"_orgTableLength":5,"_orgTableStart":187,"_orgNameLength":6,"_orgNameStart":200,"characterSet":224,"encoding":"utf8","name":"author","columnLength":1020,"columnType":253,"type":253,"flags":0,"decimals":0}]} Connected to databasePress CTRL + C to stop the application
Create a New Post
- Edit the
index.jsfile$ nano index.js - Add a new
createNewPost()method to that inserts a new post into thepoststableconst createNewPost = async (postData) => { const { title, body, author } = postData; const [newPost, fields] = await db.query('INSERT INTO posts (title, body, author) VALUES (?,?,?);', [title, body, author]); console.log(`New post created: ${JSON.stringify(newPost)}`); }CallcreateNewPost()within themain()method along with some dummy data to create a new postawait createNewPost({ title: "Test Title", body: "This is the return of test body.", author: "Tommy Shelby" });Save and close the file. - Run the application
$ node index.jsYour output should look like the one below:New post created: {"fieldCount":0,"affectedRows":1,"insertId":4,"info":"","serverStatus":2,"warningStatus":0,"changedRows":0}Press CTRL + C to stop the application
Get a Post by ID
- Edit the application file
$ nano index.js - Create a new
getPostById()method to fetch the data of a single postconst getPostById = async (postId) => { const [post, fields] = await db.query('SELECT * FROM posts WHERE id=?;', [postId]); console.log(`Post: ${JSON.stringify(post)}`); }Within themain()method, callgetPostById()with some the postId to fetch post dataawait getPostById(1); - Run the application
$ node index.jsOutput:Post: [{"id":1,"title":"Test Title","body":"This is the return of test body.","author":"Tommy Shelby"}]Press CTRL + C to stop the application
Update a Post by ID
- Edit the
index.jsfile$ nano index.js - Create a new
updatePostById()method to update thepoststable.const updatePostById = async (postId, postData) => { const { title, body } = postData; const [updatePost, fields] = await db.query('UPDATE posts SET title=?, body=? WHERE id=?;', [title, body, postId]); console.log(`Post updated: ${JSON.stringify(updatePost)}`); }Within themain()method, callupdatePostById()along with an some existing post id and the updated data. For example:await updatePostById(1, { title: 'Updated Title', body: "This is updated post body" }); - Run the application
$ node index.jsOutput:Post updated: {"fieldCount":0,"affectedRows":1,"insertId":0,"info":"Rows matched: 1 Changed: 0 Warnings: 0","serverStatus":2,"warningStatus":0,"changedRows":0}Press CTRL + C to stop the application
Delete a Post by ID
- Edit the
index.jsapplication file$ nano index.js - Create a new
deletePostById()method to delete a post by IDconst deletePostById = async (postId) => { const [post, fields] = await db.query('DELETE FROM posts WHERE id=?;', [postId]); console.log(`Post deleted : ${JSON.stringify(post)}`); }In themain()method, calldeletePostById()with some the postId to delete. For example, delete the post with ID2await deletePostById(2); - Run the application
$ node index.jsOutput:Post deleted : {"fieldCount":0,"affectedRows":1,"insertId":0,"info":"","serverStatus":2,"warningStatus":0,"changedRows":0}Press CTRL + C to stop the application
Conclusion
You have integrated a Vultr Managed Database for MySQL with your Node.js application using the mysql2 library. Using the integration, you can create efficient and scalable backend solutions that meet the demands of modern applications. For more information on how to use the mysql2 Node.js library, visit the documentation page.