Set Up Nextcloud with LAMP Stack on Ubuntu 20.04
-
by cobra_admin
- 65
Introduction
Nextcloud is an open-source collaborative platform with hundreds of apps for sharing documents, receiving emails, managing calendars, making video calls, and more. As a self-hosted solution, Nextcloud serves millions of users around the globe since it is a community-focused project that focuses on open standards for better interoperability.
The software is written in PHP and runs pretty well on a MySQL or a MariaDB database. Therefore, you can install it on top of your existing LAMP Stack infrastructure with just a few additional PHP extensions.
This guide takes you through the process of setting up a Nextcloud portal with a LAMP stack on your Ubuntu 20.04 server.
Prerequisites
To complete this guide, ensure you have the following:
- An Ubuntu 20.04 server.
- A domain name(e.g. example.com). To test the guide, you may use your server’s public IP address.
- A non-root sudo user.
- A LAMP Stack.
1. Install PHP Extensions
SSH to your server and update the package repository index.
$ sudo apt-get updateThen, run the commands below to install the necessary PHP extensions required by Nextcloud.
$ sudo apt-get install -y libapache2-mod-php
$ sudo apt-get install -y php-{cli,json,curl,imap,gd,mysql,xml,zip,intl,imagick,mbstring}
Next, enable the Apache mod_rewrite module. This allows Nextcloud to craft human-readable URLs.
$ sudo a2enmod rewrite Additionally, enable the following recommended modules.
$ sudo a2enmod headers
$ sudo a2enmod env
$ sudo a2enmod dir
$ sudo a2enmod mime
Restart the Apache webserver to load the new changes.
$ sudo systemctl restart apache2Install the unzip tool using the command below.
$ sudo apt install -y unzipOnce you’ve installed the required PHP extensions, Apache modules and the unzip command, create a database for Nextcloud in the next step.
2. Create a Nextcloud Database and a User
Connect to your MySQL/MariaDB server as a root user.
$ sudo mysql -u root -pWhen prompted, enter your database server password and press Enter to proceed. Next, issue the commands below to create a database and a user account for the Nextcloud software. Choose the appropriate commands depending on your database server. Replace EXAMPLE_PASSWORD with a strong value.
- MySQL.
mysql> CREATE DATABASE next_cloud; CREATE USER 'next_cloud_user'@'localhost' IDENTIFIED WITH mysql_native_password BY 'EXAMPLE_PASSWORD'; GRANT ALL PRIVILEGES ON next_cloud.* TO 'next_cloud_user'@'localhost'; FLUSH PRIVILEGES; EXIT; - MariaDB.
  MariaDB> CREATE DATABASE next_cloud;
           GRANT ALL PRIVILEGES on next_cloud.* TO 'next_cloud_user'@'localhost' identified by 'EXAMPLE_PASSWORD';
           EXIT;
After creating a database and setting up a user account, you’ll download Nextcloud from its official repository.
3. Download NextCloud
Create a next_cloud directory under the root of your web server.
$ sudo mkdir -p /var/www/next_cloudNext, navigate to the tmp directory.
$ cd /tmpThen, download the latest stable version of Nextcloud.
$ wget https://download.nextcloud.com/server/releases/nextcloud-21.0.2.zipNext, extract the zip file you’ve downloaded to your current directory.
$ sudo unzip -q nextcloud-21.0.2.zipCopy the extracted files to /var/www/next_cloud. The process takes a while to complete.
$ sudo rsync -rtv nextcloud/ /var/www/next_cloudChange the ownership of the /var/www/nextcloud to www-data.
$ sudo chown -R www-data:www-data /var/www/next_cloudYour Nextcloud files are now in place; before you complete the setup process, you’ll create a virtual host file for Nextcloud in the next step.
4. Set Up a Virtual Host for Nextcloud
First, disable the default Apache virtual host configuration file using the a2dissite command.
$ sudo a2dissite 000-default.confThen, open a new configuration file for your Nextcloud site under /etc/apache2/sites-available.
$ sudo nano /etc/apache2/sites-available/next_cloud.confEnter the information below into the file and replace example.com with your server’s correct domain name or public IP address.
<VirtualHost *:80>

  DocumentRoot /var/www/next_cloud
  ServerName  example.com

  Alias /nextcloud "/var/www/next_cloud/"

  <Directory /var/www/next_cloud>

    Options +FollowSymlinks
    AllowOverride All

    <IfModule mod_dav.c>
      Dav off
    </IfModule>

    SetEnv HOME /var/www/next_cloud/
    SetEnv HTTP_HOME /var/www/next_cloud/

  </Directory>

</VirtualHost>
Save the new file by pressing Ctrl + X, then Y and Enter. Then, enable the new configuration file using the a2ensite command.
$ sudo a2ensite next_cloud.confRestart Apache to load the new configurations.
$ sudo systemctl restart apache2Apache is now ready to serve your Nextcloud site. You’ll finalize the installation in the next step.
5. Complete NextCloud Installation
Visit the URL below on a web browser. Remember to replace example.com with the correct domain name or IP address of your server.
- http://example.com
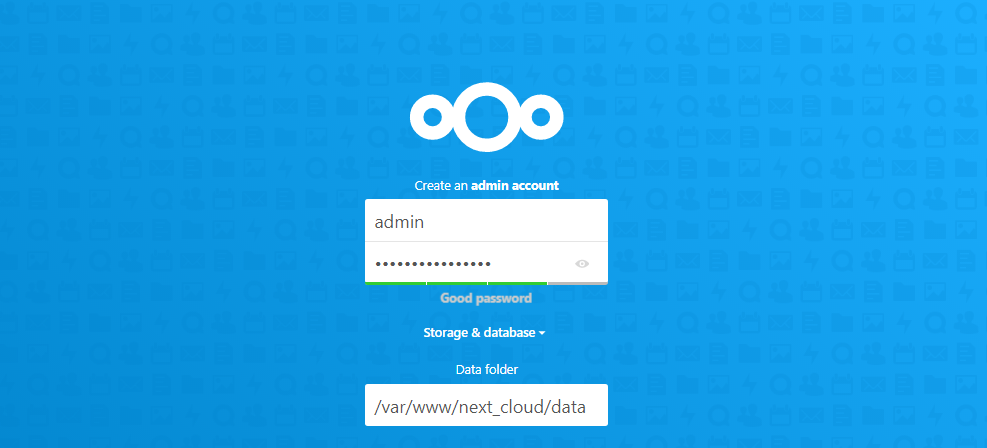
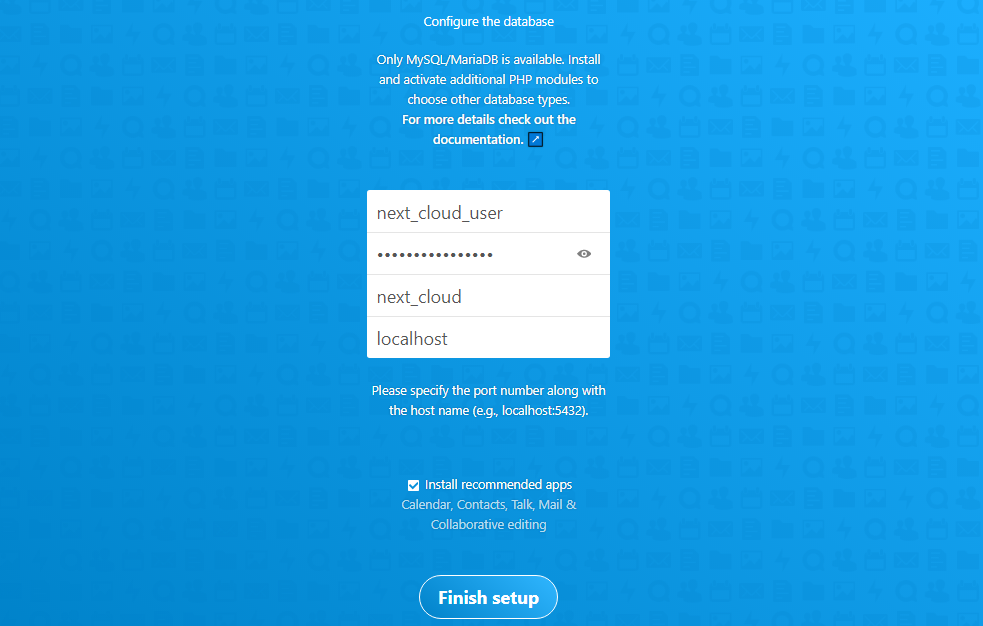
Create an admin account and configure the database and click Finish setup.


Once you’ve finalized the installation process, access the Nextcloud portal and enter your admin account details.
- http://example.com
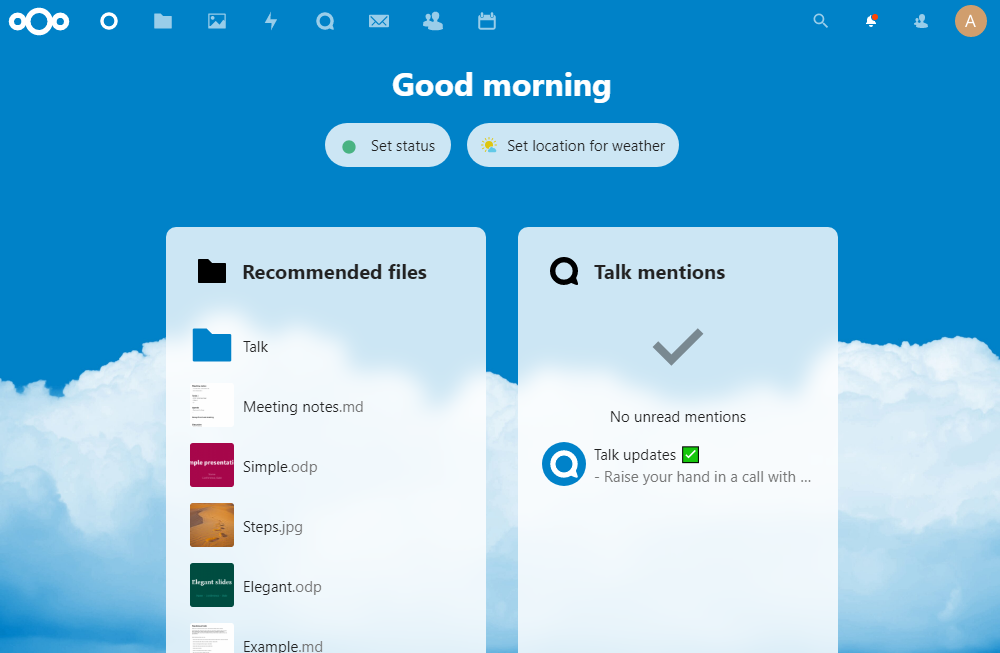
You should now see the following dashboard.

This shows that your Nextcloud installation has been completed successfully.
Conclusion
In this tutorial, you’ve set up a Nextcloud collaborative portal with a LAMP stack on your Ubuntu 20.04 server. Use the application to ensure: compliance, security, and flexibility of your data. Nextcloud unique communication technology suits all types of organizations, including colleges, hospitals, banks, and research institutions.
Introduction Nextcloud is an open-source collaborative platform with hundreds of apps for sharing documents, receiving emails, managing calendars, making video calls, and more. As a self-hosted solution, Nextcloud serves millions of users around the globe since it is a community-focused project that focuses on open standards for better interoperability. The…
Introduction Nextcloud is an open-source collaborative platform with hundreds of apps for sharing documents, receiving emails, managing calendars, making video calls, and more. As a self-hosted solution, Nextcloud serves millions of users around the globe since it is a community-focused project that focuses on open standards for better interoperability. The…